Diagnostic Results
Diagnostic results are laboratory and imaging reports that reach the clinic. Find them at Patients → Results (/results) and in the Results section of each patient’s chart. Front desk staff file incoming reports, and doctors sign them off.
Who can do this
| Task | Clinic Admin | Receptionist | Doctor | Nurse |
|---|---|---|---|---|
| See results and open a result | Yes | Yes | Yes | Yes |
| File an incoming result | Yes | Yes | Yes | Yes |
| Sign off a result | No | No | Yes | No |
| Reassign a review to another doctor | Yes | No | Yes | No |
| Withdraw a misfiled result | Yes | No | Yes | No |
| Change the results review rota | Yes | No | No | No |
| See the results review rota | Yes | View only | View only | View only |
Any doctor can sign off any result, whoever it was routed to. Routing only decides whose list a result appears in first.
The results inbox
The inbox opens on Needs review. Use the buttons above the table to switch views.
| View | What it shows |
|---|---|
| Needs review | Every result no doctor has signed off yet, with a count |
| For me | Needs-review results routed to you, with a count |
| Ordered by me | Results for tests you ordered |
| Signed off | Results a doctor has signed off |
| All | Every result except withdrawn ones |
You can narrow the list with Patient name, Any type (Laboratory or Imaging), Any facility, and Abnormal only. If more results exist, select Load more.
Unreviewed results are listed critical first, then abnormal, then the oldest first. Times are shown in Singapore time.
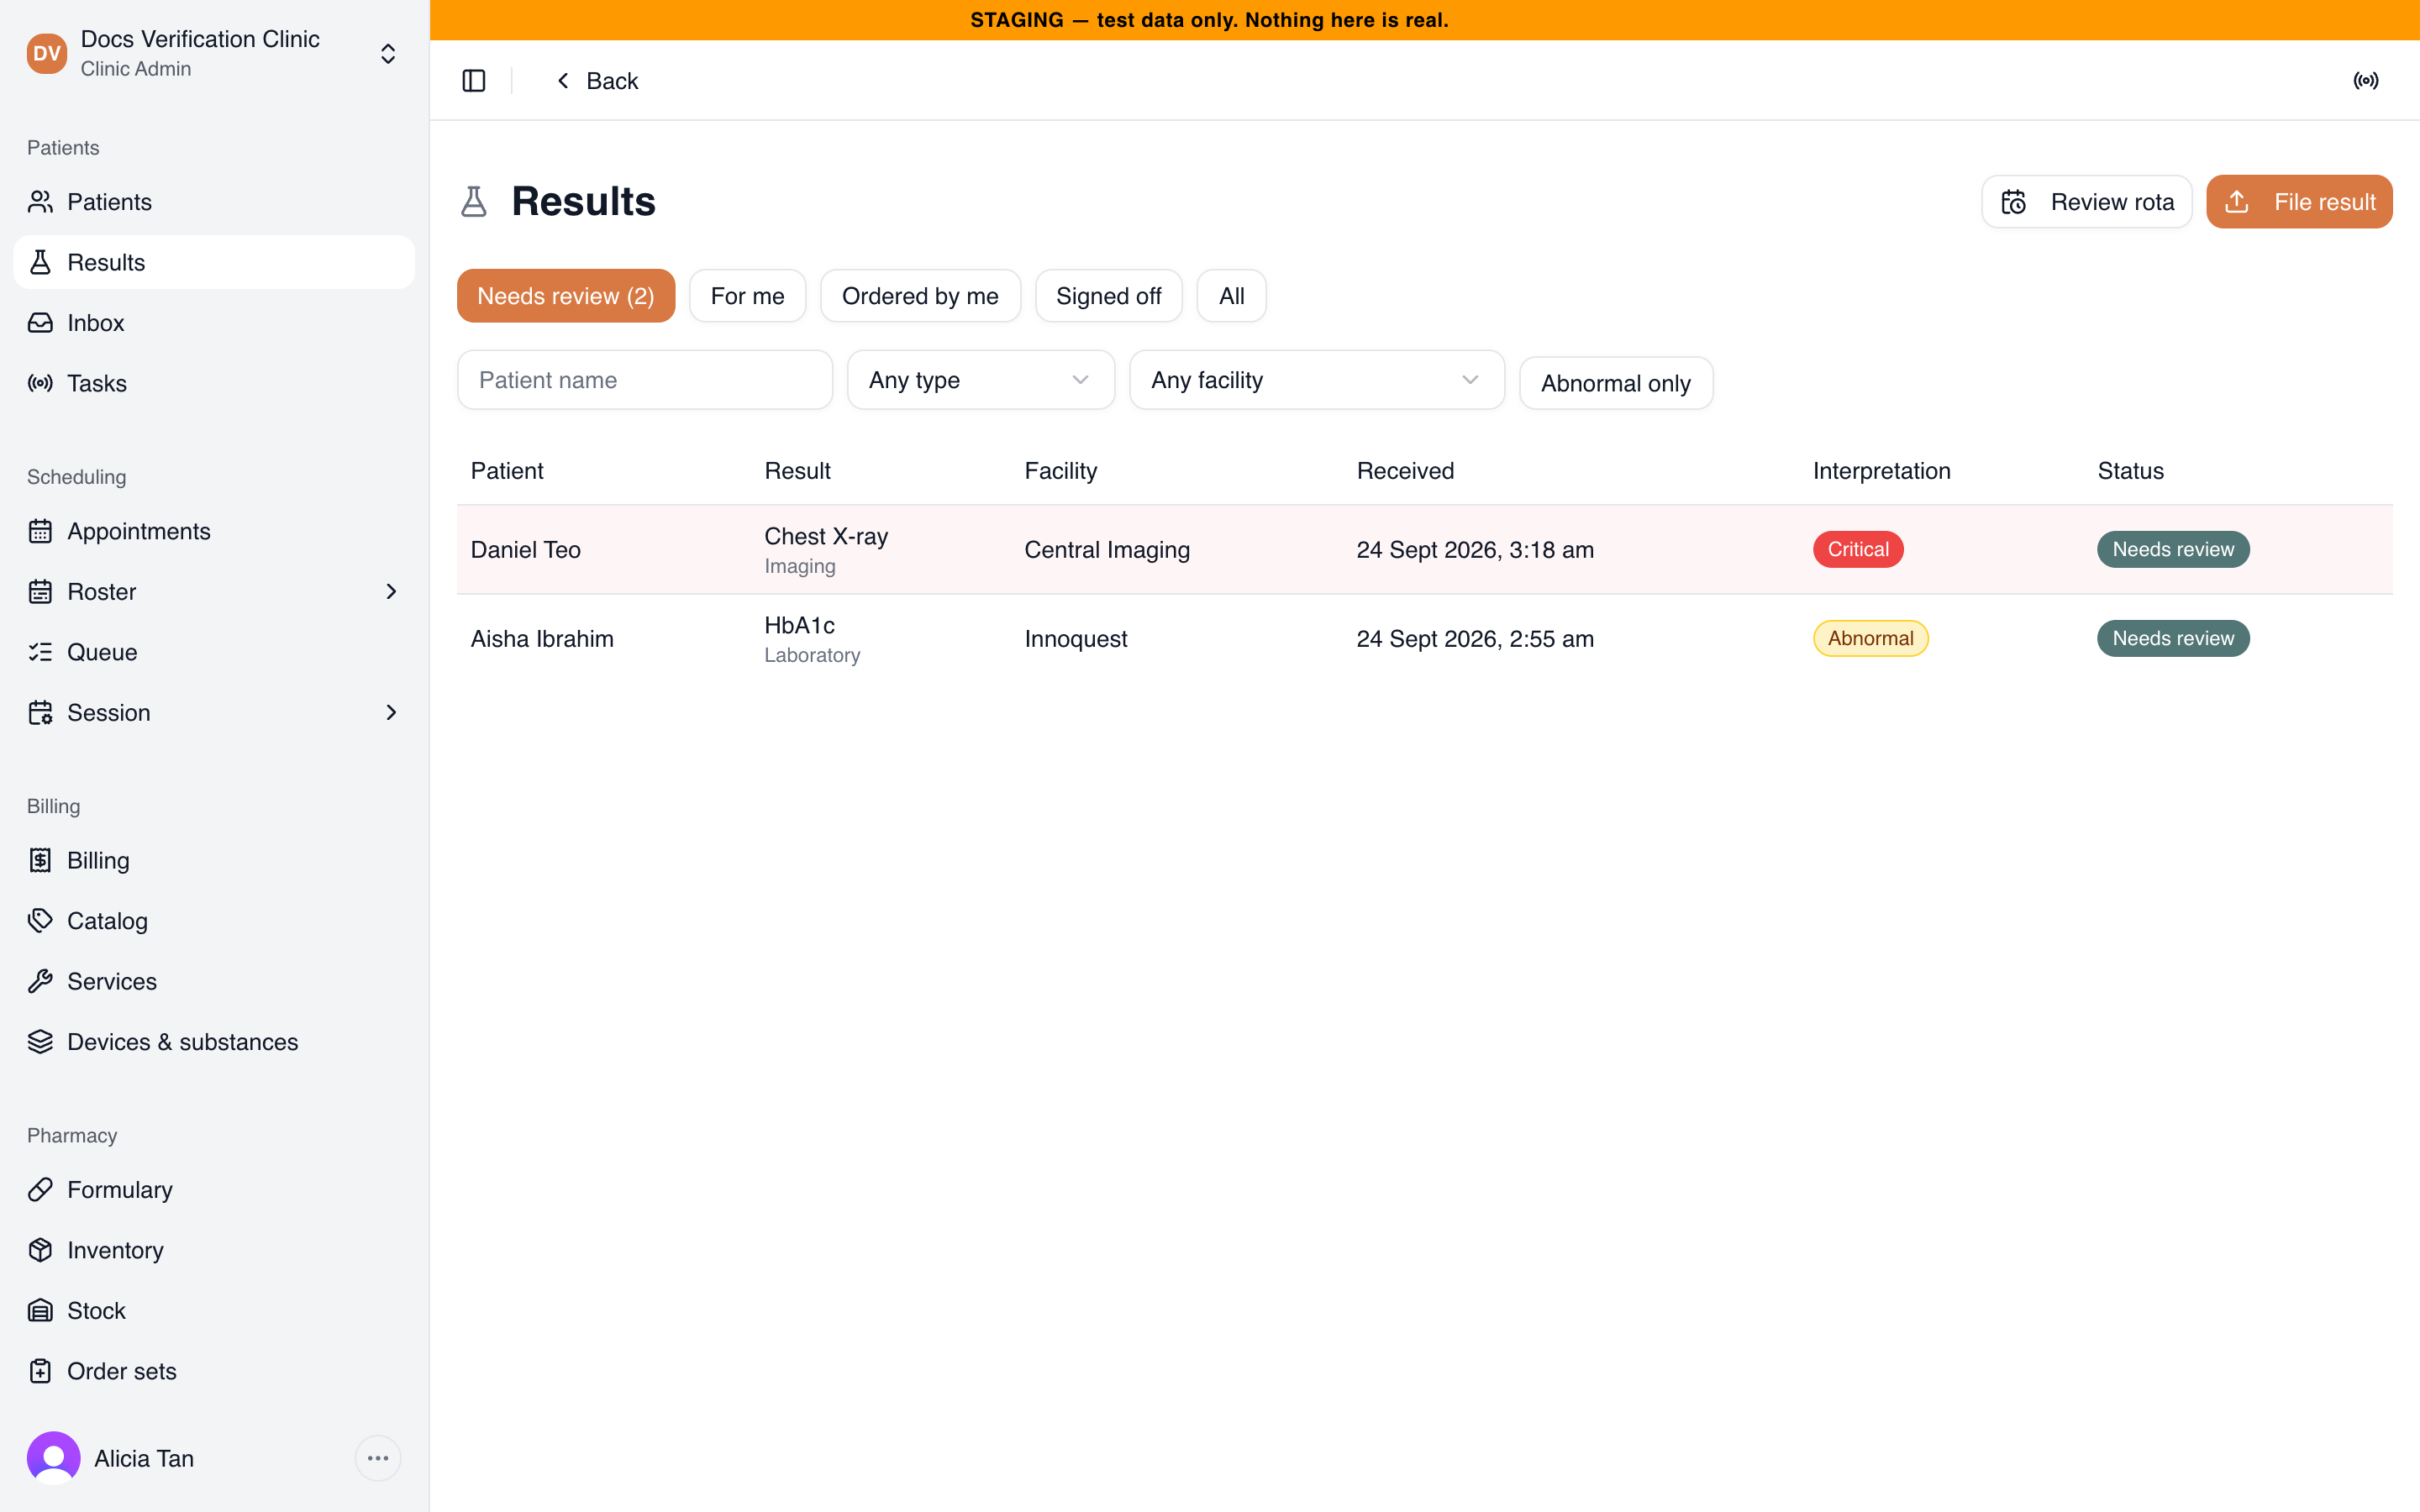
The results inbox, with the critical result at the top
Select a row to open the result. The window shows the dates, who ordered the test, who it is routed to, the values, and the summary. Select Open report to view the attached report.
Filing an incoming result
Anyone who works at the front desk or the clinic floor can file a result. Filing sends it to the inbox for a doctor to review.
- Select File result. On a patient’s chart, use File result in the Results section.
- Under Patient, search by name and select the patient.
- Choose the Receiving clinic, the Type, and enter the Name of the test, for example “Full blood count”.
- Enter the Performing lab / centre, and who the test was Ordered by. Choose a doctor at this clinic, or type an Outside orderer (optional). Do not fill both.
- Enter Collected / performed and Report date. Neither can be in the future.
- Under Scanned report, attach the report. It must be a PDF, PNG, or JPEG file no larger than 8 MB. Medbot checks the file itself, not its name.
- Optionally, key in Values (optional). Select a panel such as Full blood count, or + Row for a single value.
- Optionally, set Overall interpretation and Summary / impression.
- Select File result.
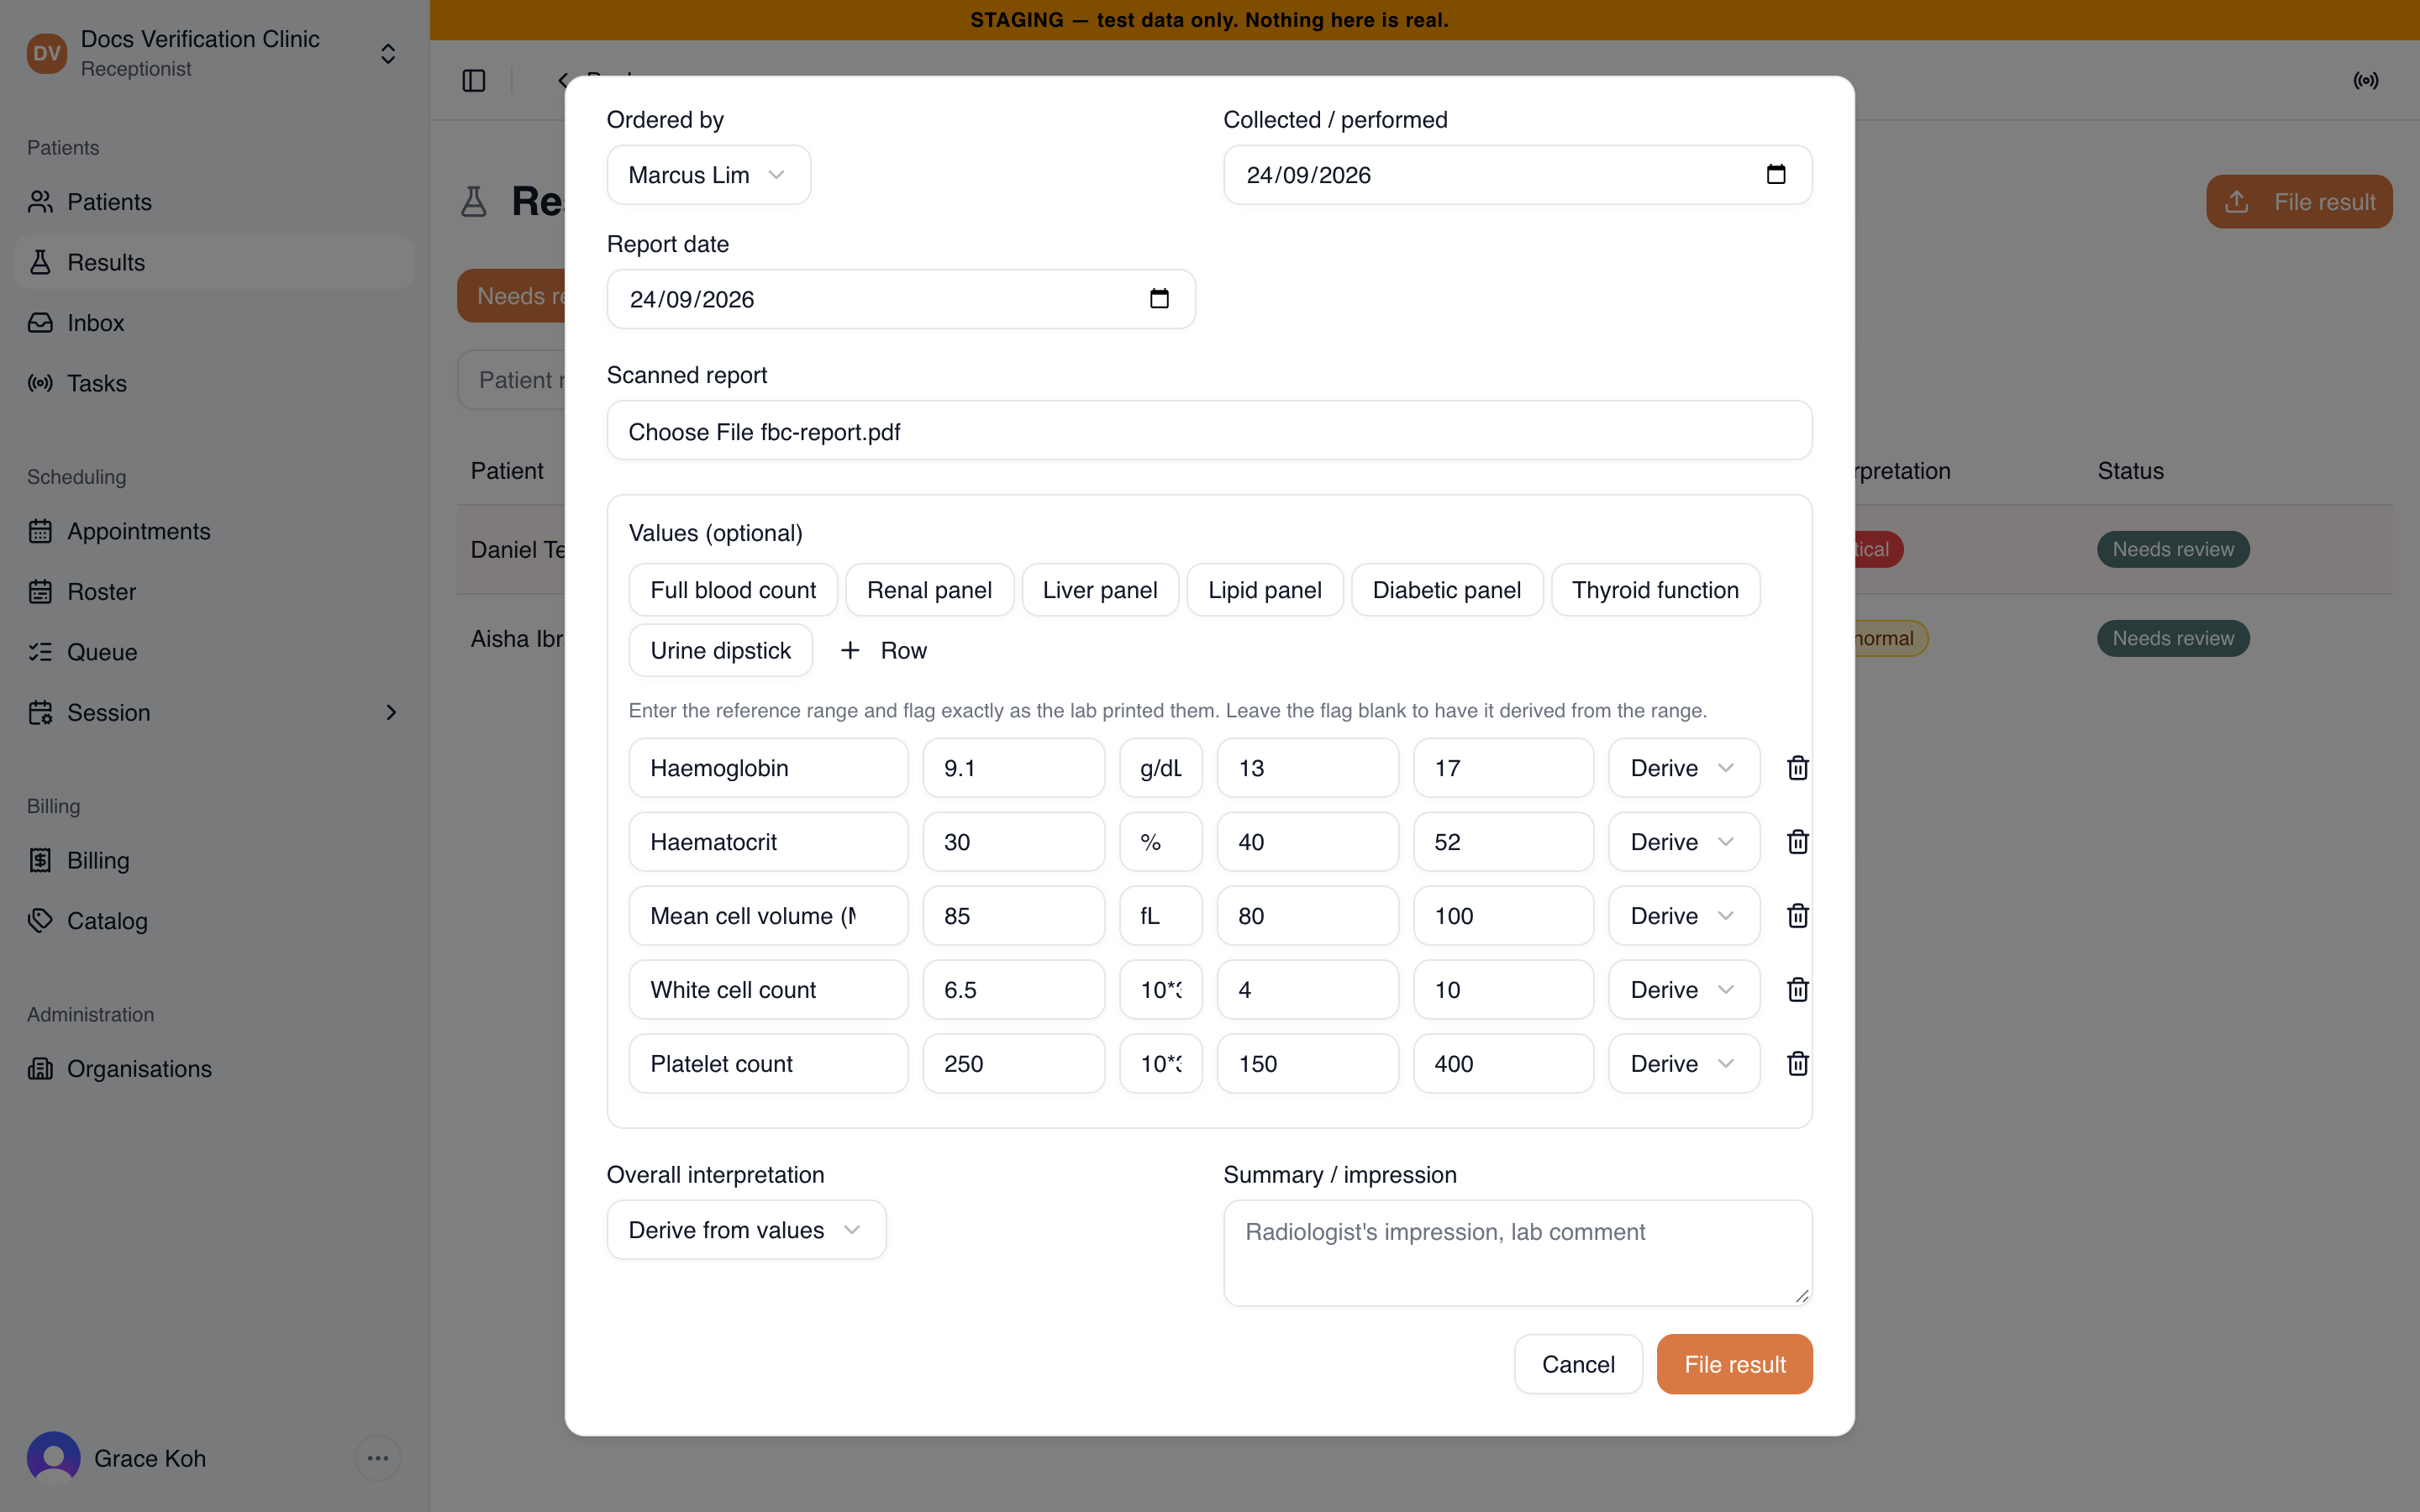
Values keyed in from a full blood count panel
You must attach a report, key in at least one value, or both. A single report can carry up to 60 values.
Values and interpretation
Enter each reference range and flag exactly as the lab printed them. If you leave the flag as Derive, Medbot compares a number with the lab’s own range: below the range is low, above is high. A value on the edge of the range is normal. With no range and no flag, the value stays unflagged.
The Overall interpretation starts as Derive from values. If you also choose one by hand, the more serious of the two is kept. This matters for imaging reports, which have no values.
Messages you may see
| Message | What to do |
|---|---|
| Choose the patient this result belongs to. | Search for the patient and select them. |
| Give the result a name, e.g. “Full blood count”. | Fill in Name. |
| Attach the report, enter at least one value, or both. | Add a report or a value. |
| Upload the report as a PDF, PNG, or JPEG. | Attach a different file. |
| The report must be smaller than 8 MB. | Attach a smaller file. |
| A result cannot be collected or issued in the future. | Correct the date. |
| The ordering doctor is not available at this clinic location. | Choose another doctor, or use Outside orderer (optional). |
Signing off a result
Only a doctor can sign off, because it is a clinical decision recorded under the doctor’s name.
- Open the result and select Sign off.
- Under What should happen next?, choose No action needed, Inform patient, Recall patient, Repeat / further test, or Refer.
- For anything other than No action needed, choose How urgent? and, if you like, Within (days). Then describe what the patient should be told or booked for.
- Optionally, write What the patient will read (optional). The patient sees it as “What this means”.
- Select Sign off.
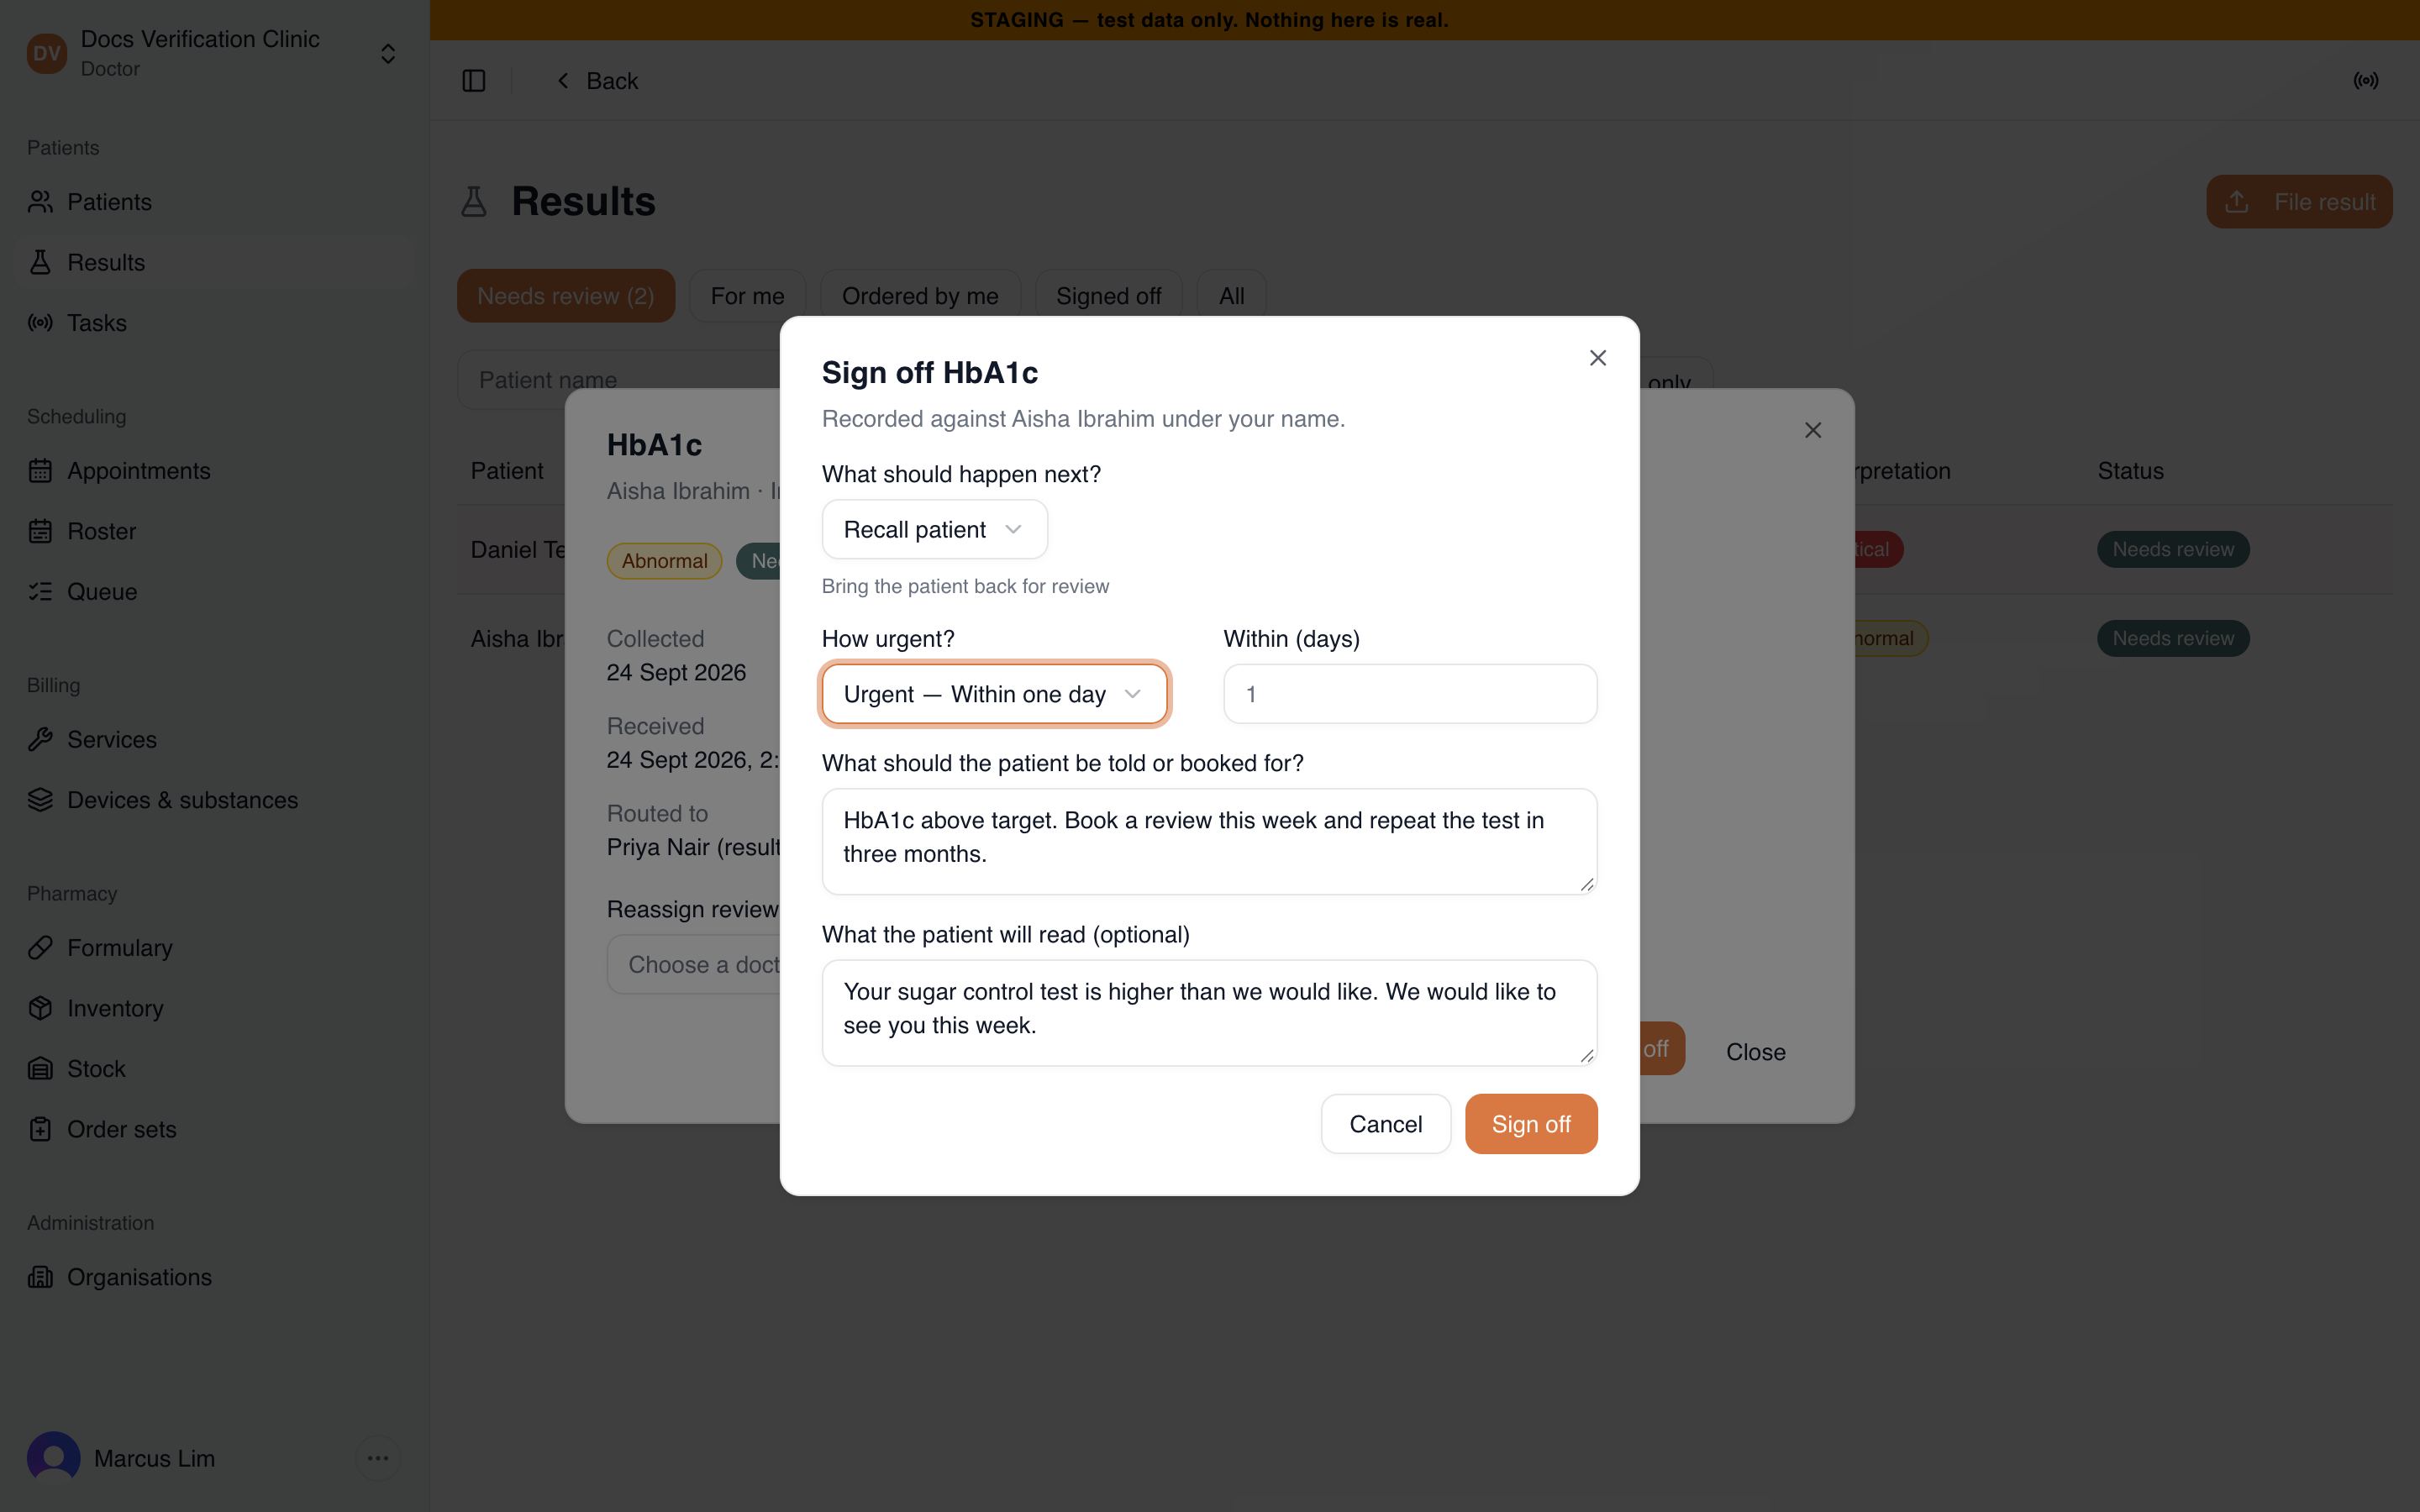
Signing off with a recall
| Urgency | Default due date |
|---|---|
| Routine | Within 14 days |
| Urgent | Within one day |
| Immediate | Today |
You can enter up to 365 days. Notes can be up to 2,000 characters. Your own note is for the clinic and is never shown to the patient.
Any choice except No action needed creates a follow-up, shown on the result and on the patient’s chart. A follow-up starts as Open with its due date.
If your account has no linked clinical profile, sign-off is refused. Ask a Clinic Admin to fix your account.
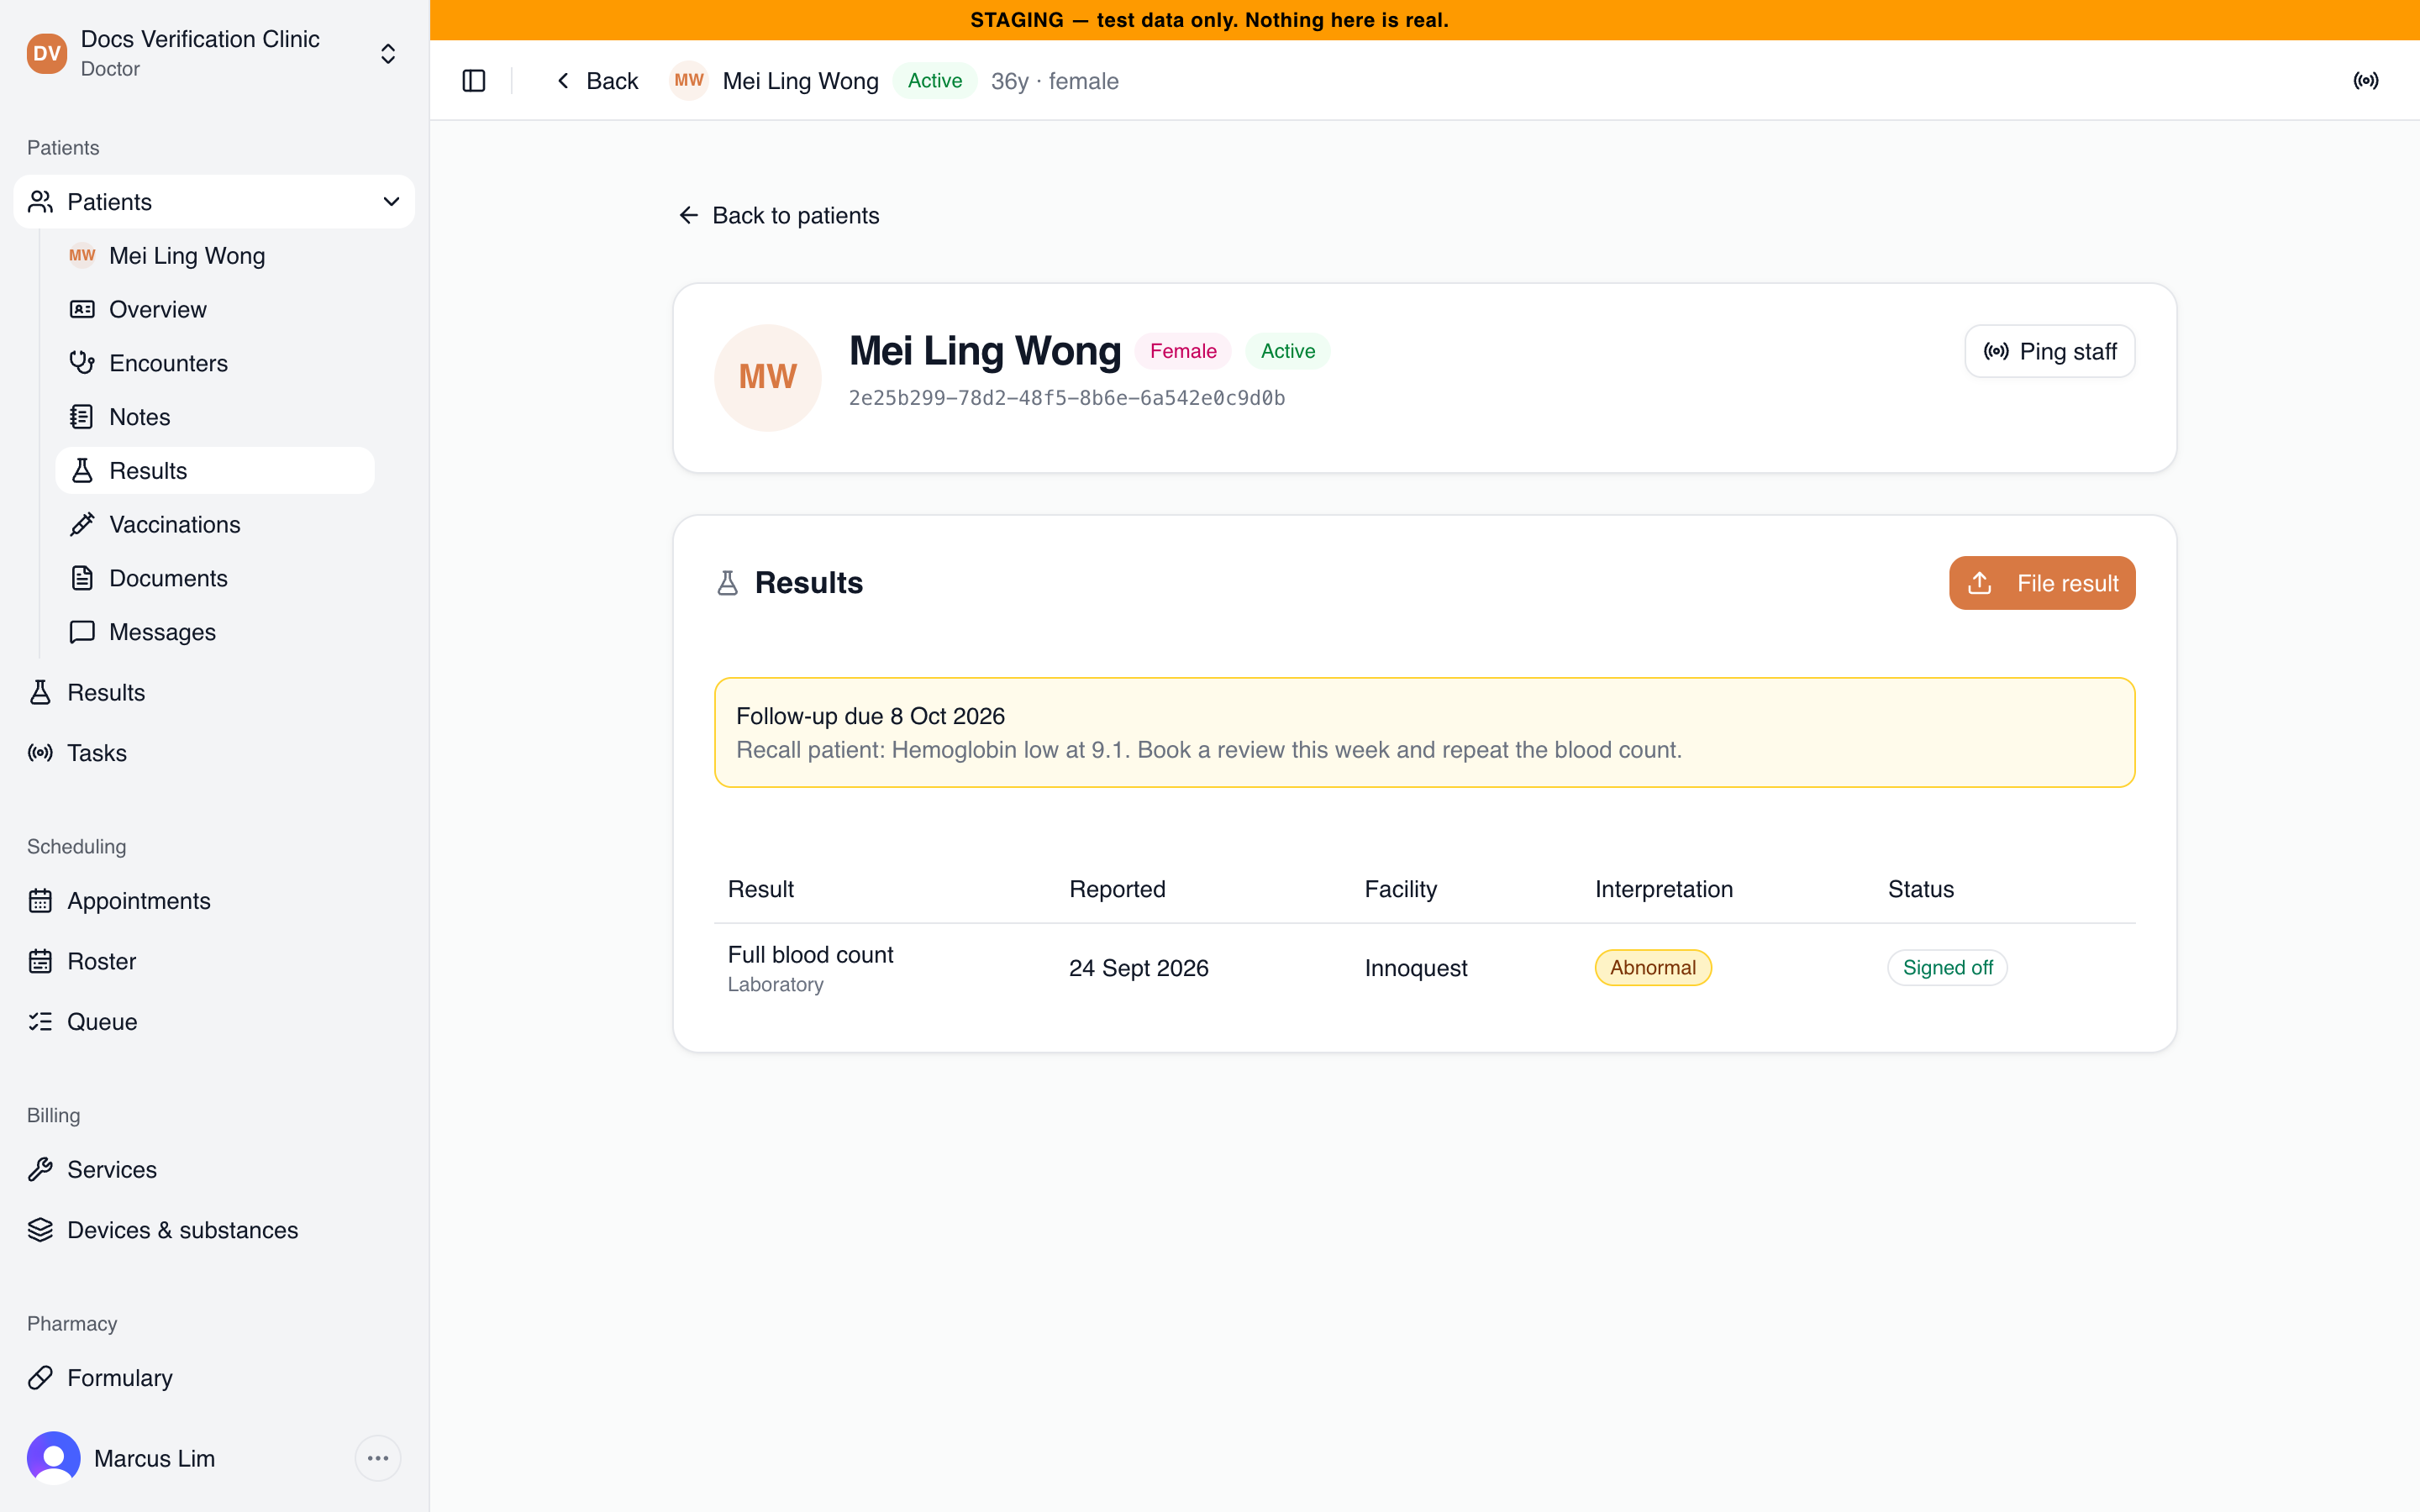
A patient’s Results section with an open follow-up
Reassigning and withdrawing
A Clinic Admin or a doctor can reassign a result that still needs review. Open it and choose a doctor under Reassign review to, or choose Unassigned. The doctor must work at the result’s clinic location.
To withdraw a result filed by mistake, open it, select Withdraw, and give a reason under “Why is this result being withdrawn?”. Then select Confirm withdrawal. A withdrawn result no longer appears in the inbox. Its open review and follow-ups are cancelled. It stays on the patient’s chart with the reason, for the audit trail.
The review rota
The rota decides who is responsible for results that arrive each day at one clinic location. Only a Clinic Admin sees the Review rota button on the results page. It opens /results/roster. Others can open the page by its address but cannot change it.
A result is routed to the doctor who ordered the test. It is also routed to the doctors rostered at that location for the day it arrived.
To change a day, select Edit beside it and tick the doctors. Each tick saves at once. You can edit past days, so that late-filed results reach the right doctor.
What the patient sees
A patient sees nothing that reads like a conclusion until a doctor has signed the result off. A Critical flag is hidden from the patient after a recall, repeat test, or referral, so they hear it from a clinician first. The signed-off text appears as “What this means”. See Patient for the patient’s side.
Related
- Patient Records & Consent: the chart where results sit.
- Clinic Messaging: contacting a patient about a result.
- Roles & Permissions: what each role can do across the CMS.