Patient Records & Consent
Patient records are the list of everyone registered at your clinic and each person’s chart. Find them at Patients → Patients (/patients). All four roles can open a chart. Front desk staff register patients.
Who can do this
| Task | Clinic Admin | Receptionist | Doctor | Nurse |
|---|---|---|---|---|
| See the patient list and open a chart | Yes | Yes | Yes | Yes |
| Register a patient | Yes | Yes | No | No |
| Invite a patient to self-register | Yes | Yes | No | No |
| Deactivate a patient | Yes | Yes | No | No |
| Edit contact details | Yes | Yes | Yes | Yes |
| Record or change communication consent | Yes | Yes | Yes | Yes |
Doctors and nurses who open /patients/new or /patients/invite see the message “This action requires one of the following roles: admin, receptionist.”
Finding a patient
The list shows each patient’s name, contact details, birth date, gender, address and status. Search by name only. Phone, email and identifier numbers are not searched. Use the status filter to show Active, Inactive or Deceased patients. The newest updates appear first, 20 patients per page.
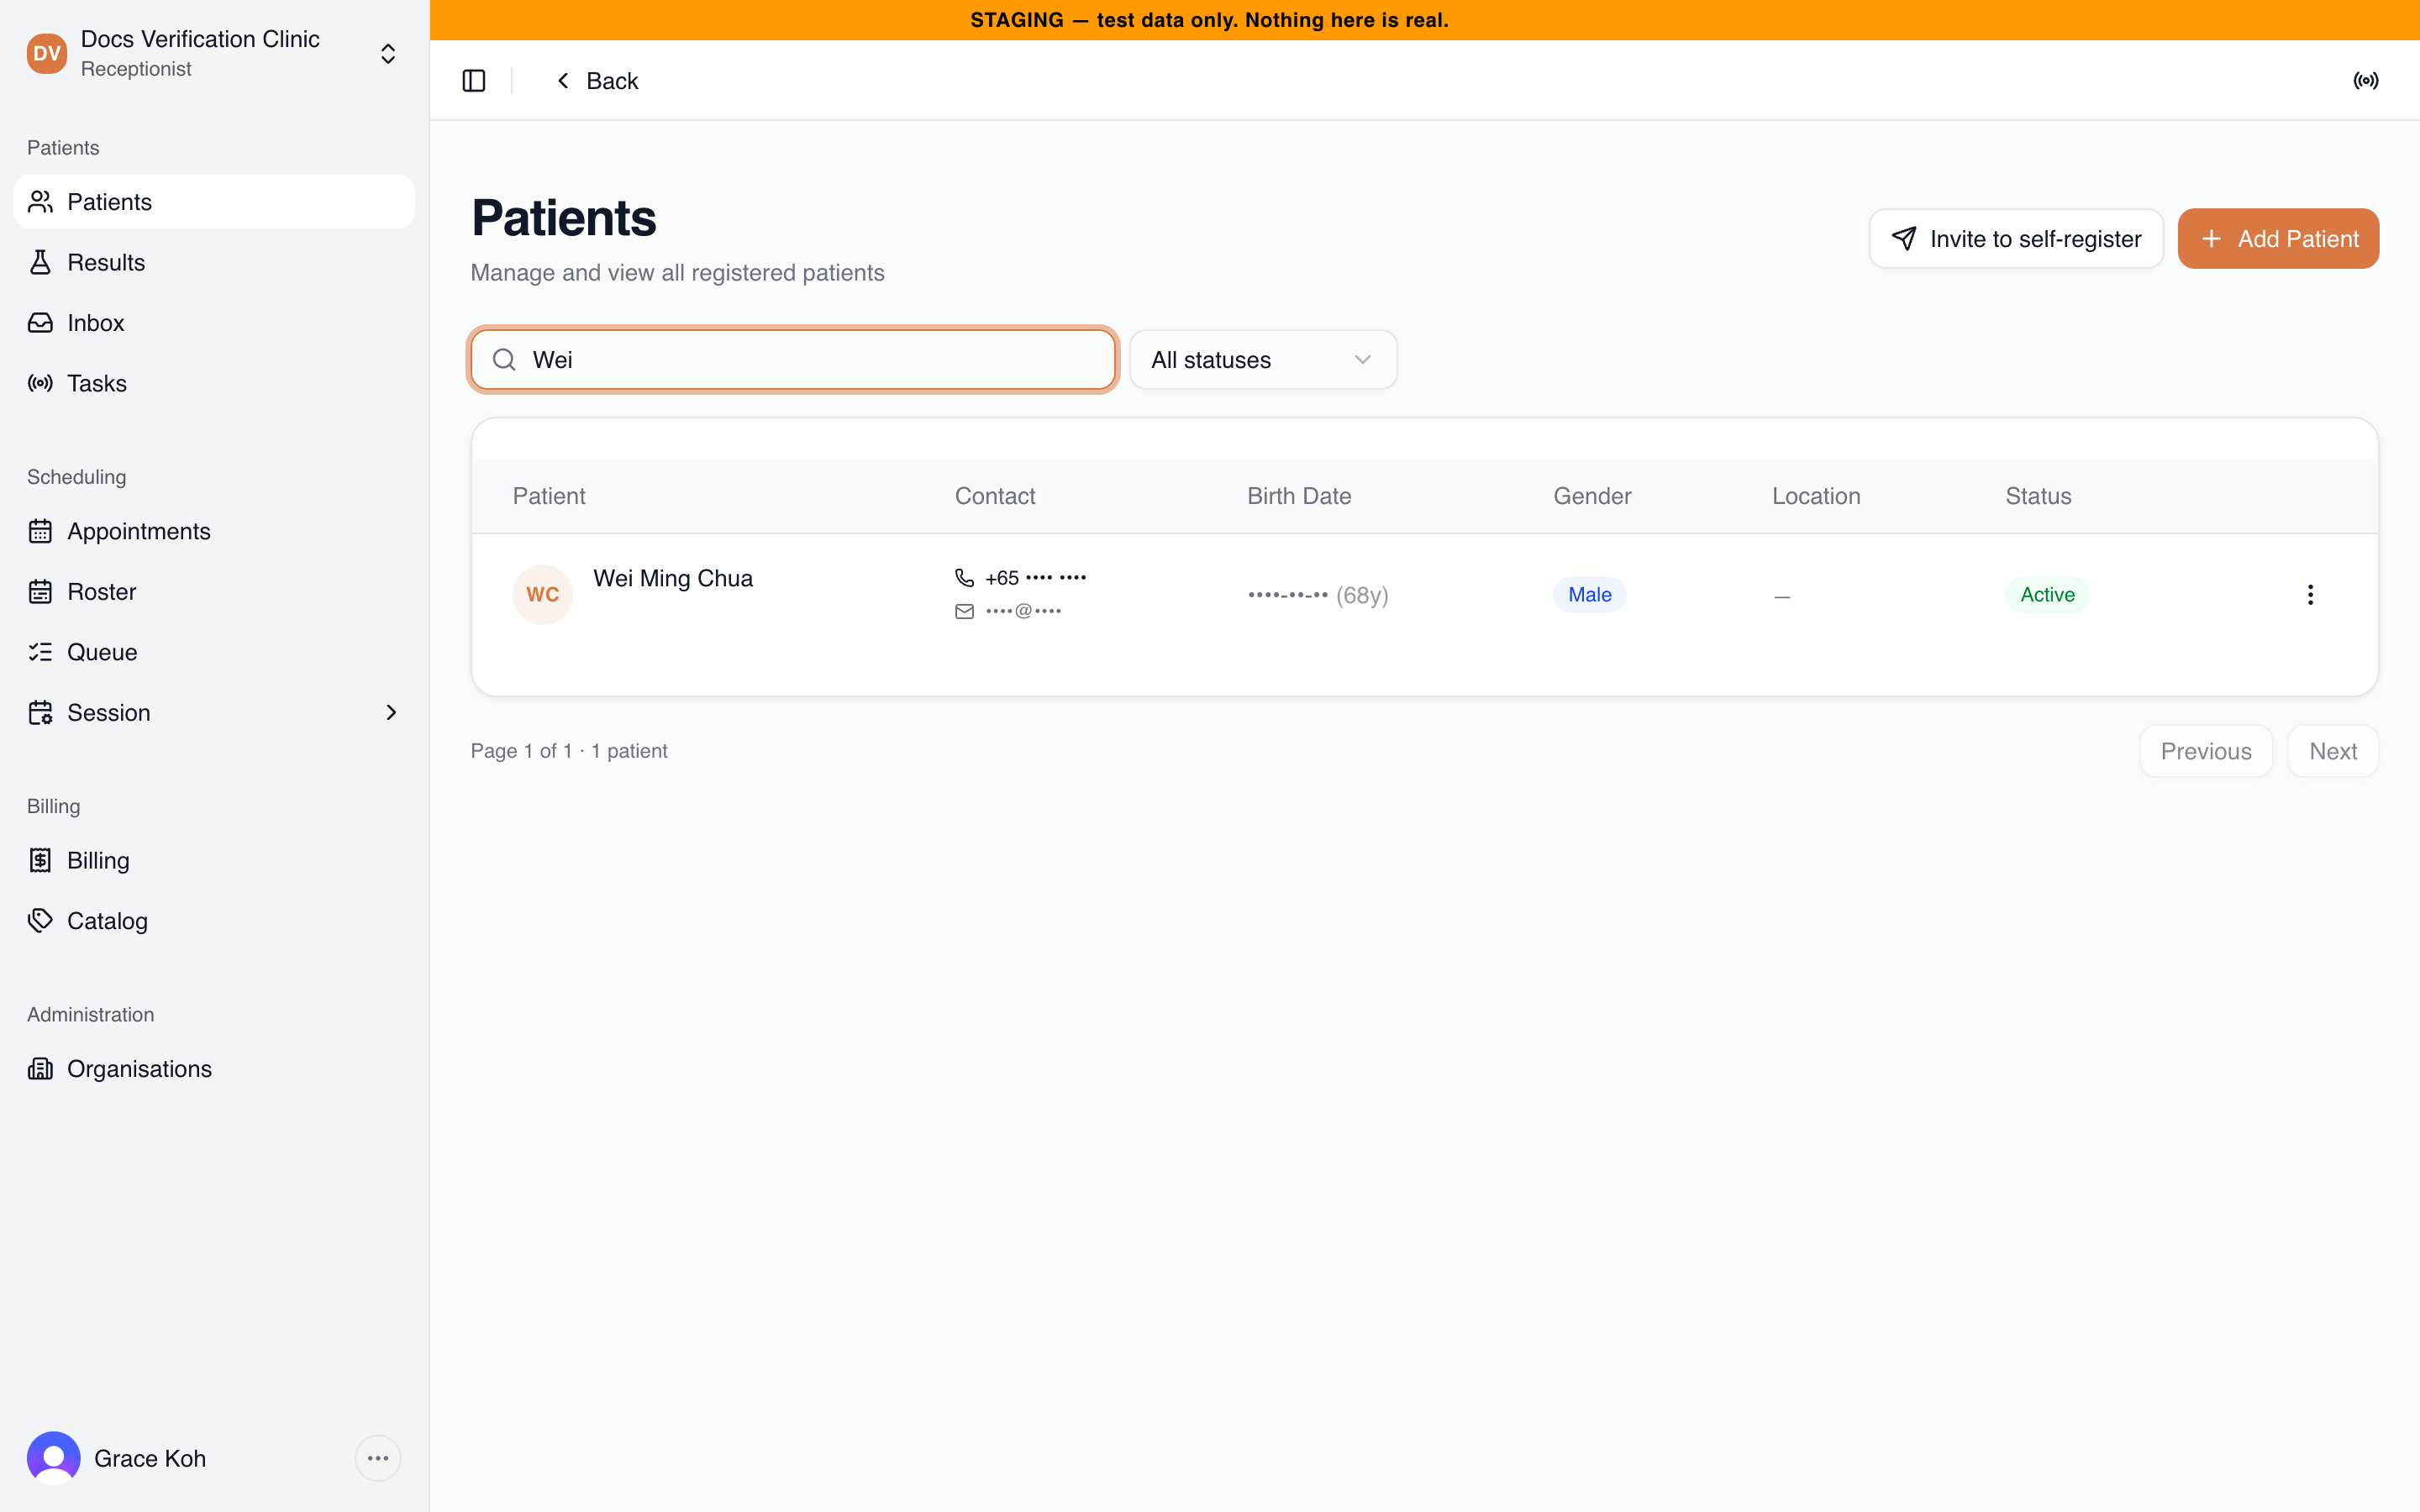
The Patients page
Patients with no phone or email on file carry a No contact on file badge.
Registering a patient
- Select Add Patient.
- Choose the Identifier type: NRIC, FIN or Passport, then enter the number. The form says Valid when the number is acceptable, or explains why not.
- Enter Given name, Family name and Date of birth. These are required. Sex defaults to Unknown.
- Optionally add a phone number, an email address, the Preferred contact channel (Phone or Email), communication consent and an address.
- Select Register patient. The new patient’s chart opens.
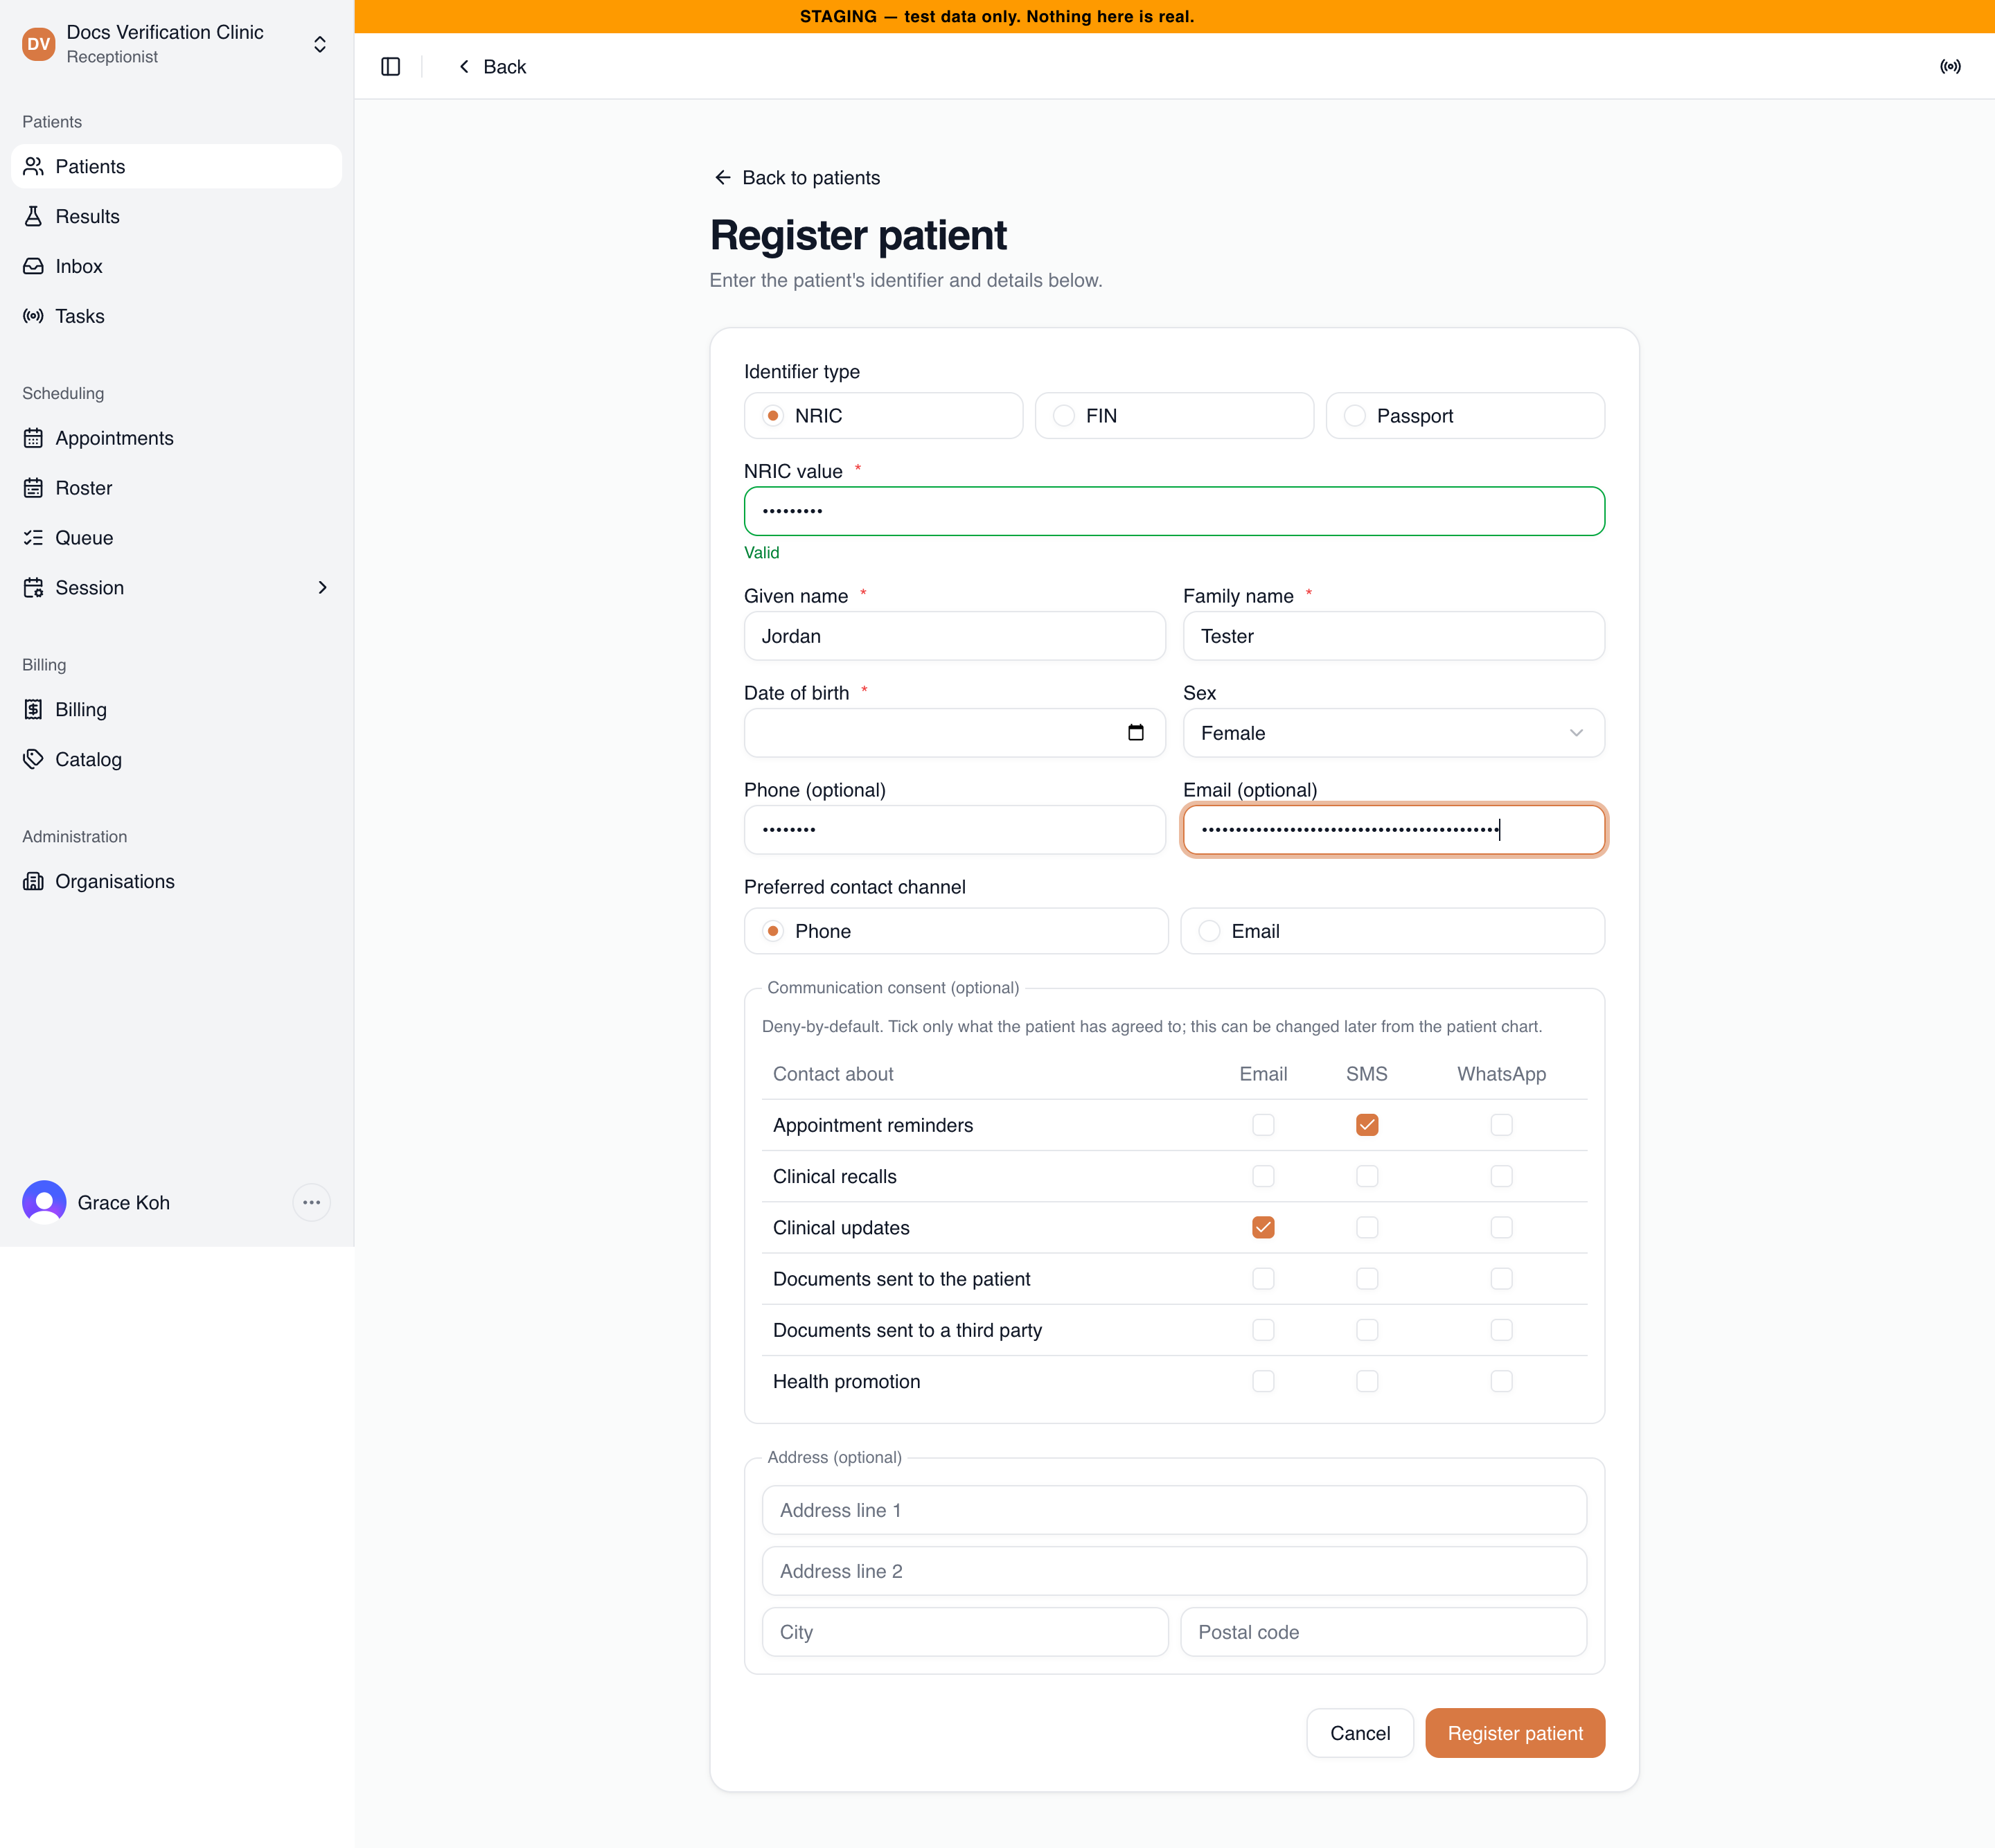
The Register patient form
Rules the form enforces:
- The identifier must match the selected type. A wrong check digit shows “Identifier doesn’t match the selected type (NRIC).” and keeps Register patient disabled.
- A patient with the same identifier can exist only once per clinic. Otherwise you see “A patient with this identifier already exists in this clinic,” and the message notes that the patient may be archived and points you to the clinic’s medical record system to view or restore them. Names are not compared. Search by name first (including the Inactive filter) to avoid a second record for the same person. If a matching patient is inactive, restore the existing record rather than registering a new one.
- A Singapore mobile number has 8 digits and starts with 8 or 9. Other numbers start with a plus sign and have 8 to 15 digits. A number with seven or more zeros in a row is refused.
- If consent could not be saved, the patient is still registered. A warning tells you to record consent again from the chart.
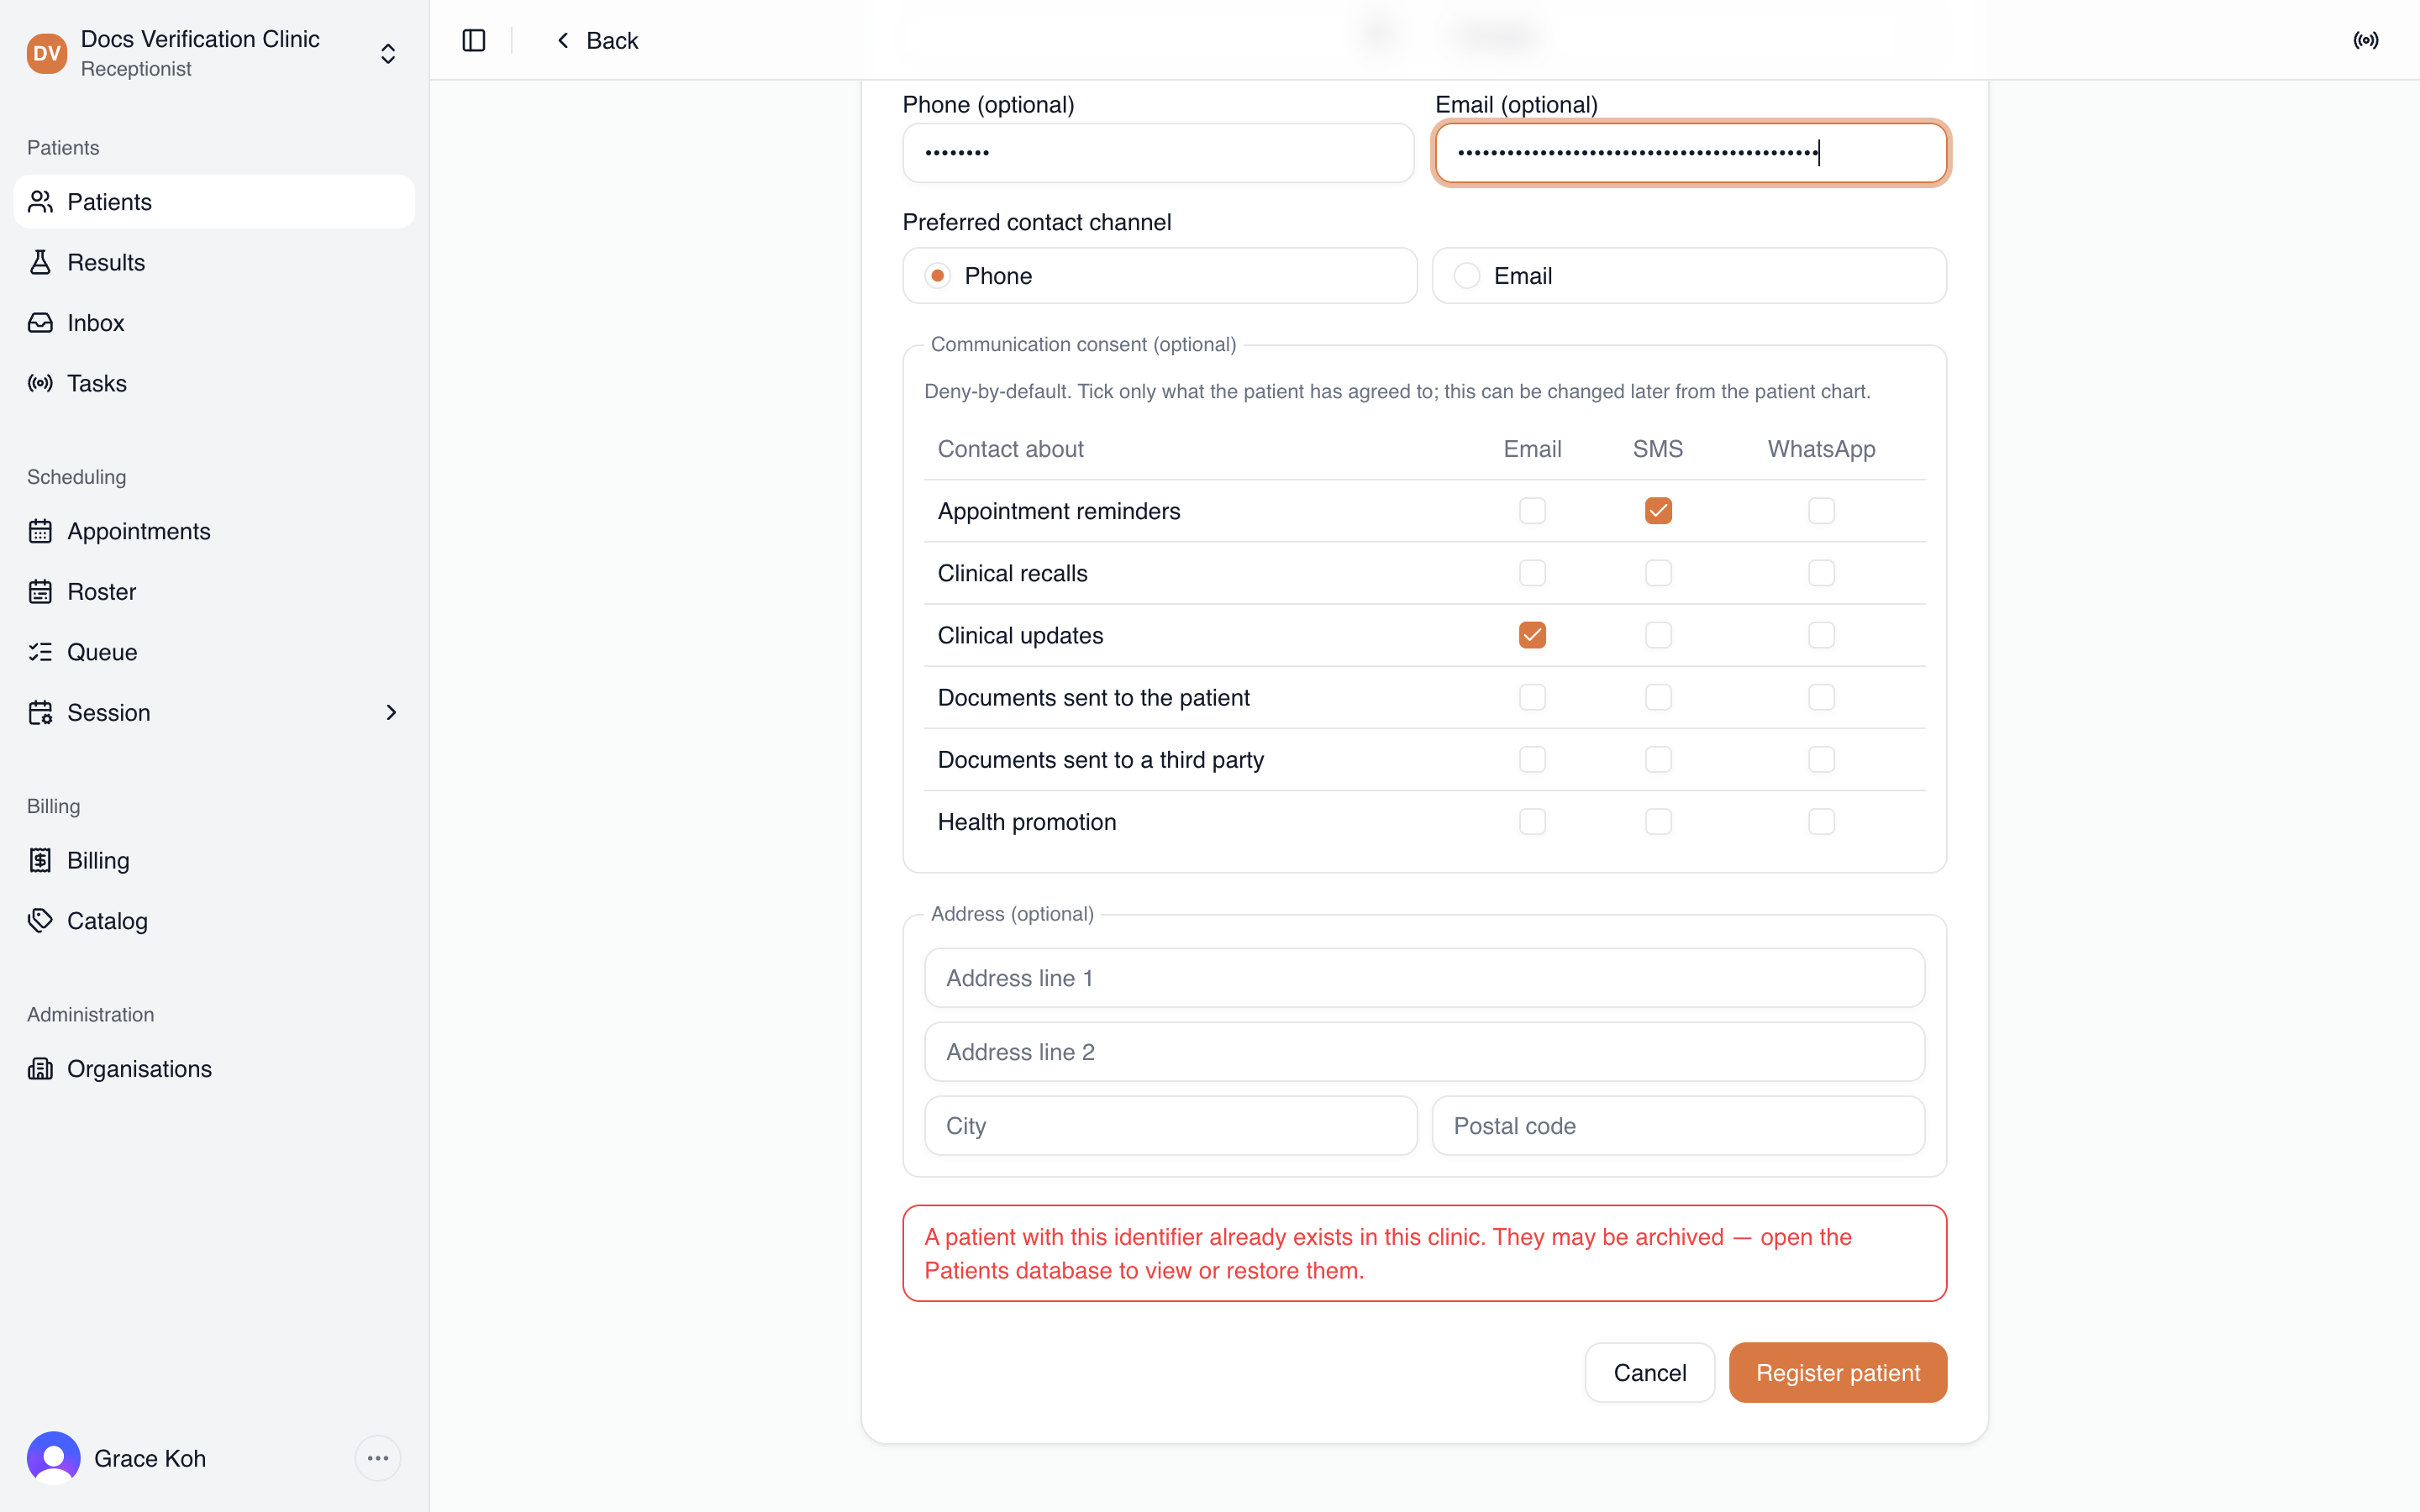
The duplicate identifier message
The patient chart
The chart opens on Overview. Cards on the overview:
| Card | What it shows |
|---|---|
| Patient-reported intake | Answers from a self-registration, only for patients who registered themselves |
| Demographics | Birth date, gender, and marital status, preferred language and date of death when recorded |
| Contact | Phone and email with a Preferred badge, plus Portal invite, Caregivers and Edit contact. See Caregiver access |
| Address | Addresses on file |
| Identifiers | Identifier type and number |
| Communication consent | Consent by purpose and channel, plus Edit consent |
| Vitals | See Vitals |
| Clinical notes | See Encounters & Clinical Notes |
The sidebar lists the other chart sections under the patient’s name: Accounts, Encounters, Notes, Results, Vaccinations, Documents and Messages. Accounts is visible to Clinic Admins and Receptionists only. Ping staff at the top of every chart sends a staff ping.
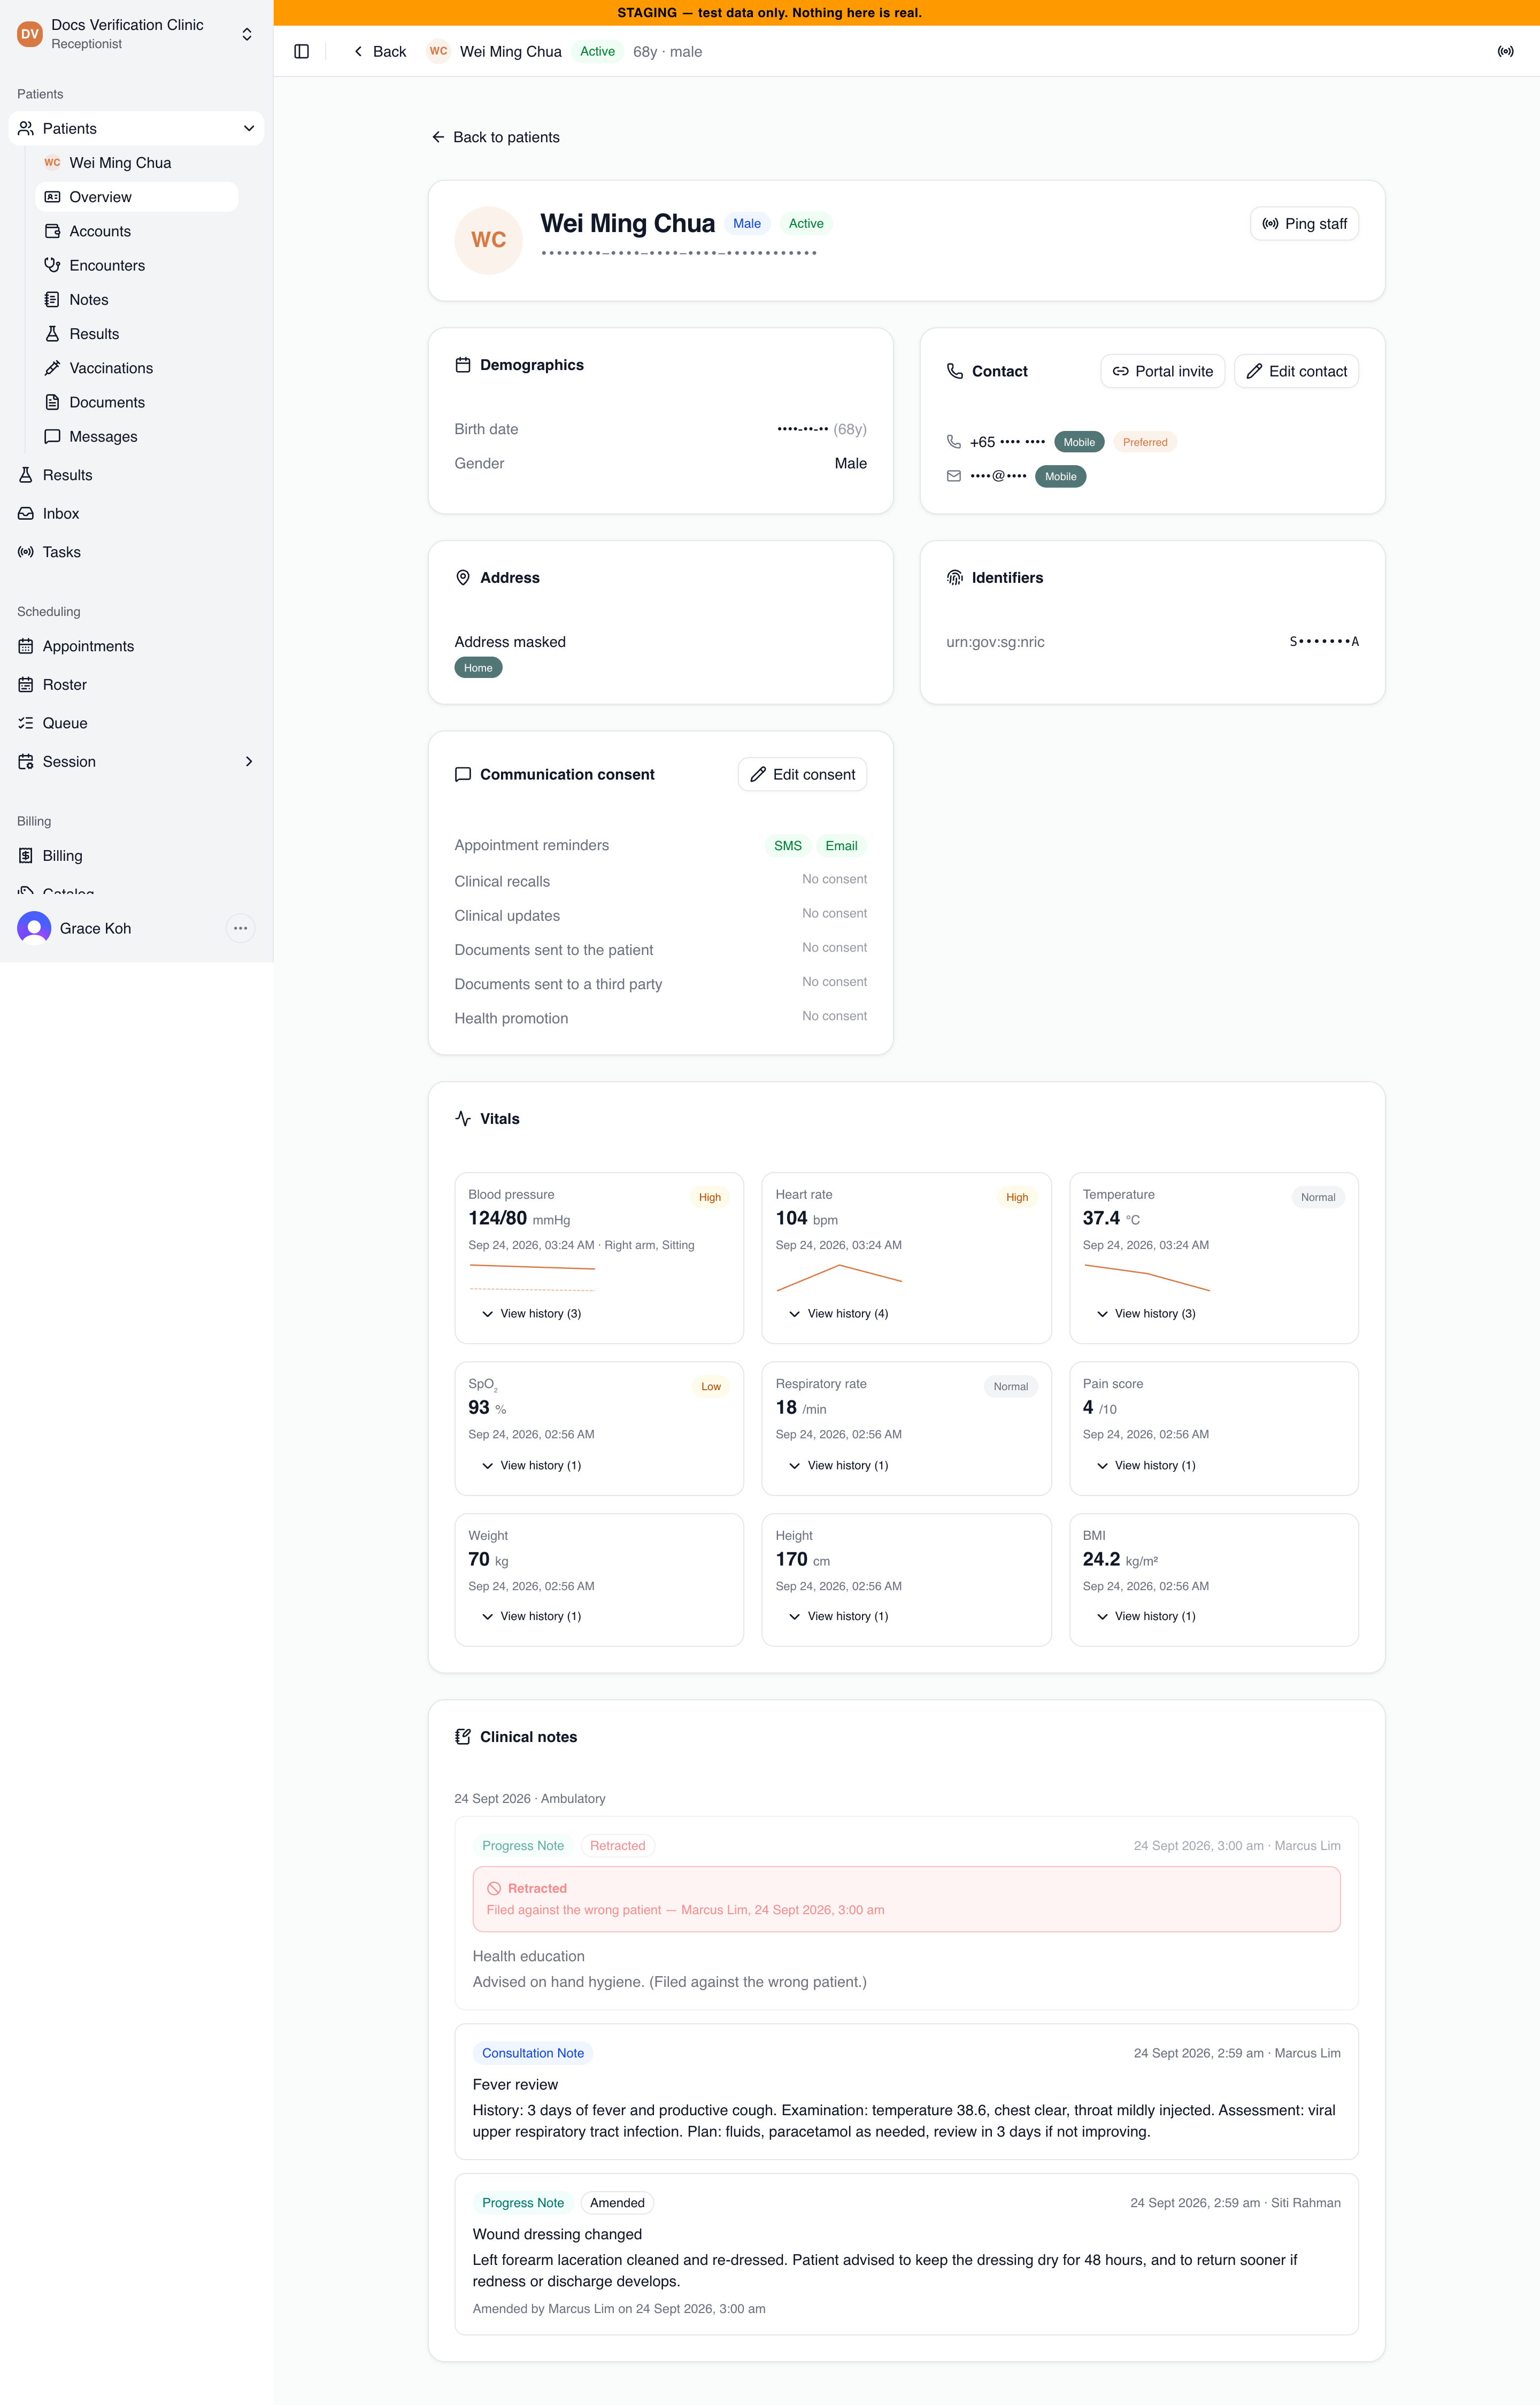
A patient chart overview
Editing contact details
- On Overview, select Edit contact.
- Change Phone, Email or Preferred channel. Clearing a field removes that entry.
- Select Save contact.
Invalid numbers are refused with “Invalid phone number.” or “Invalid email address.” If a colleague saved the chart after you opened it, you see “This record changed since you opened it. Please refresh and try again.” Refresh the chart and repeat the change.
Communication consent
Consent controls how the clinic may contact a patient. It is deny by default: the clinic may contact a patient only for the purpose and channel combinations ticked. Purposes are Appointment reminders, Clinical recalls, Clinical updates, Documents sent to the patient, Documents sent to a third party and Health promotion. Channels are Email, SMS and WhatsApp. You can record SMS and WhatsApp consent even when the clinic does not send on those channels yet.
- On Overview, select Edit consent.
- Tick the purpose and channel combinations the patient agreed to.
- Select Save consent. Saving replaces the whole set, so untick anything the patient withdrew.
A purpose with nothing ticked shows No consent. Treat any combination not shown as not permitted.
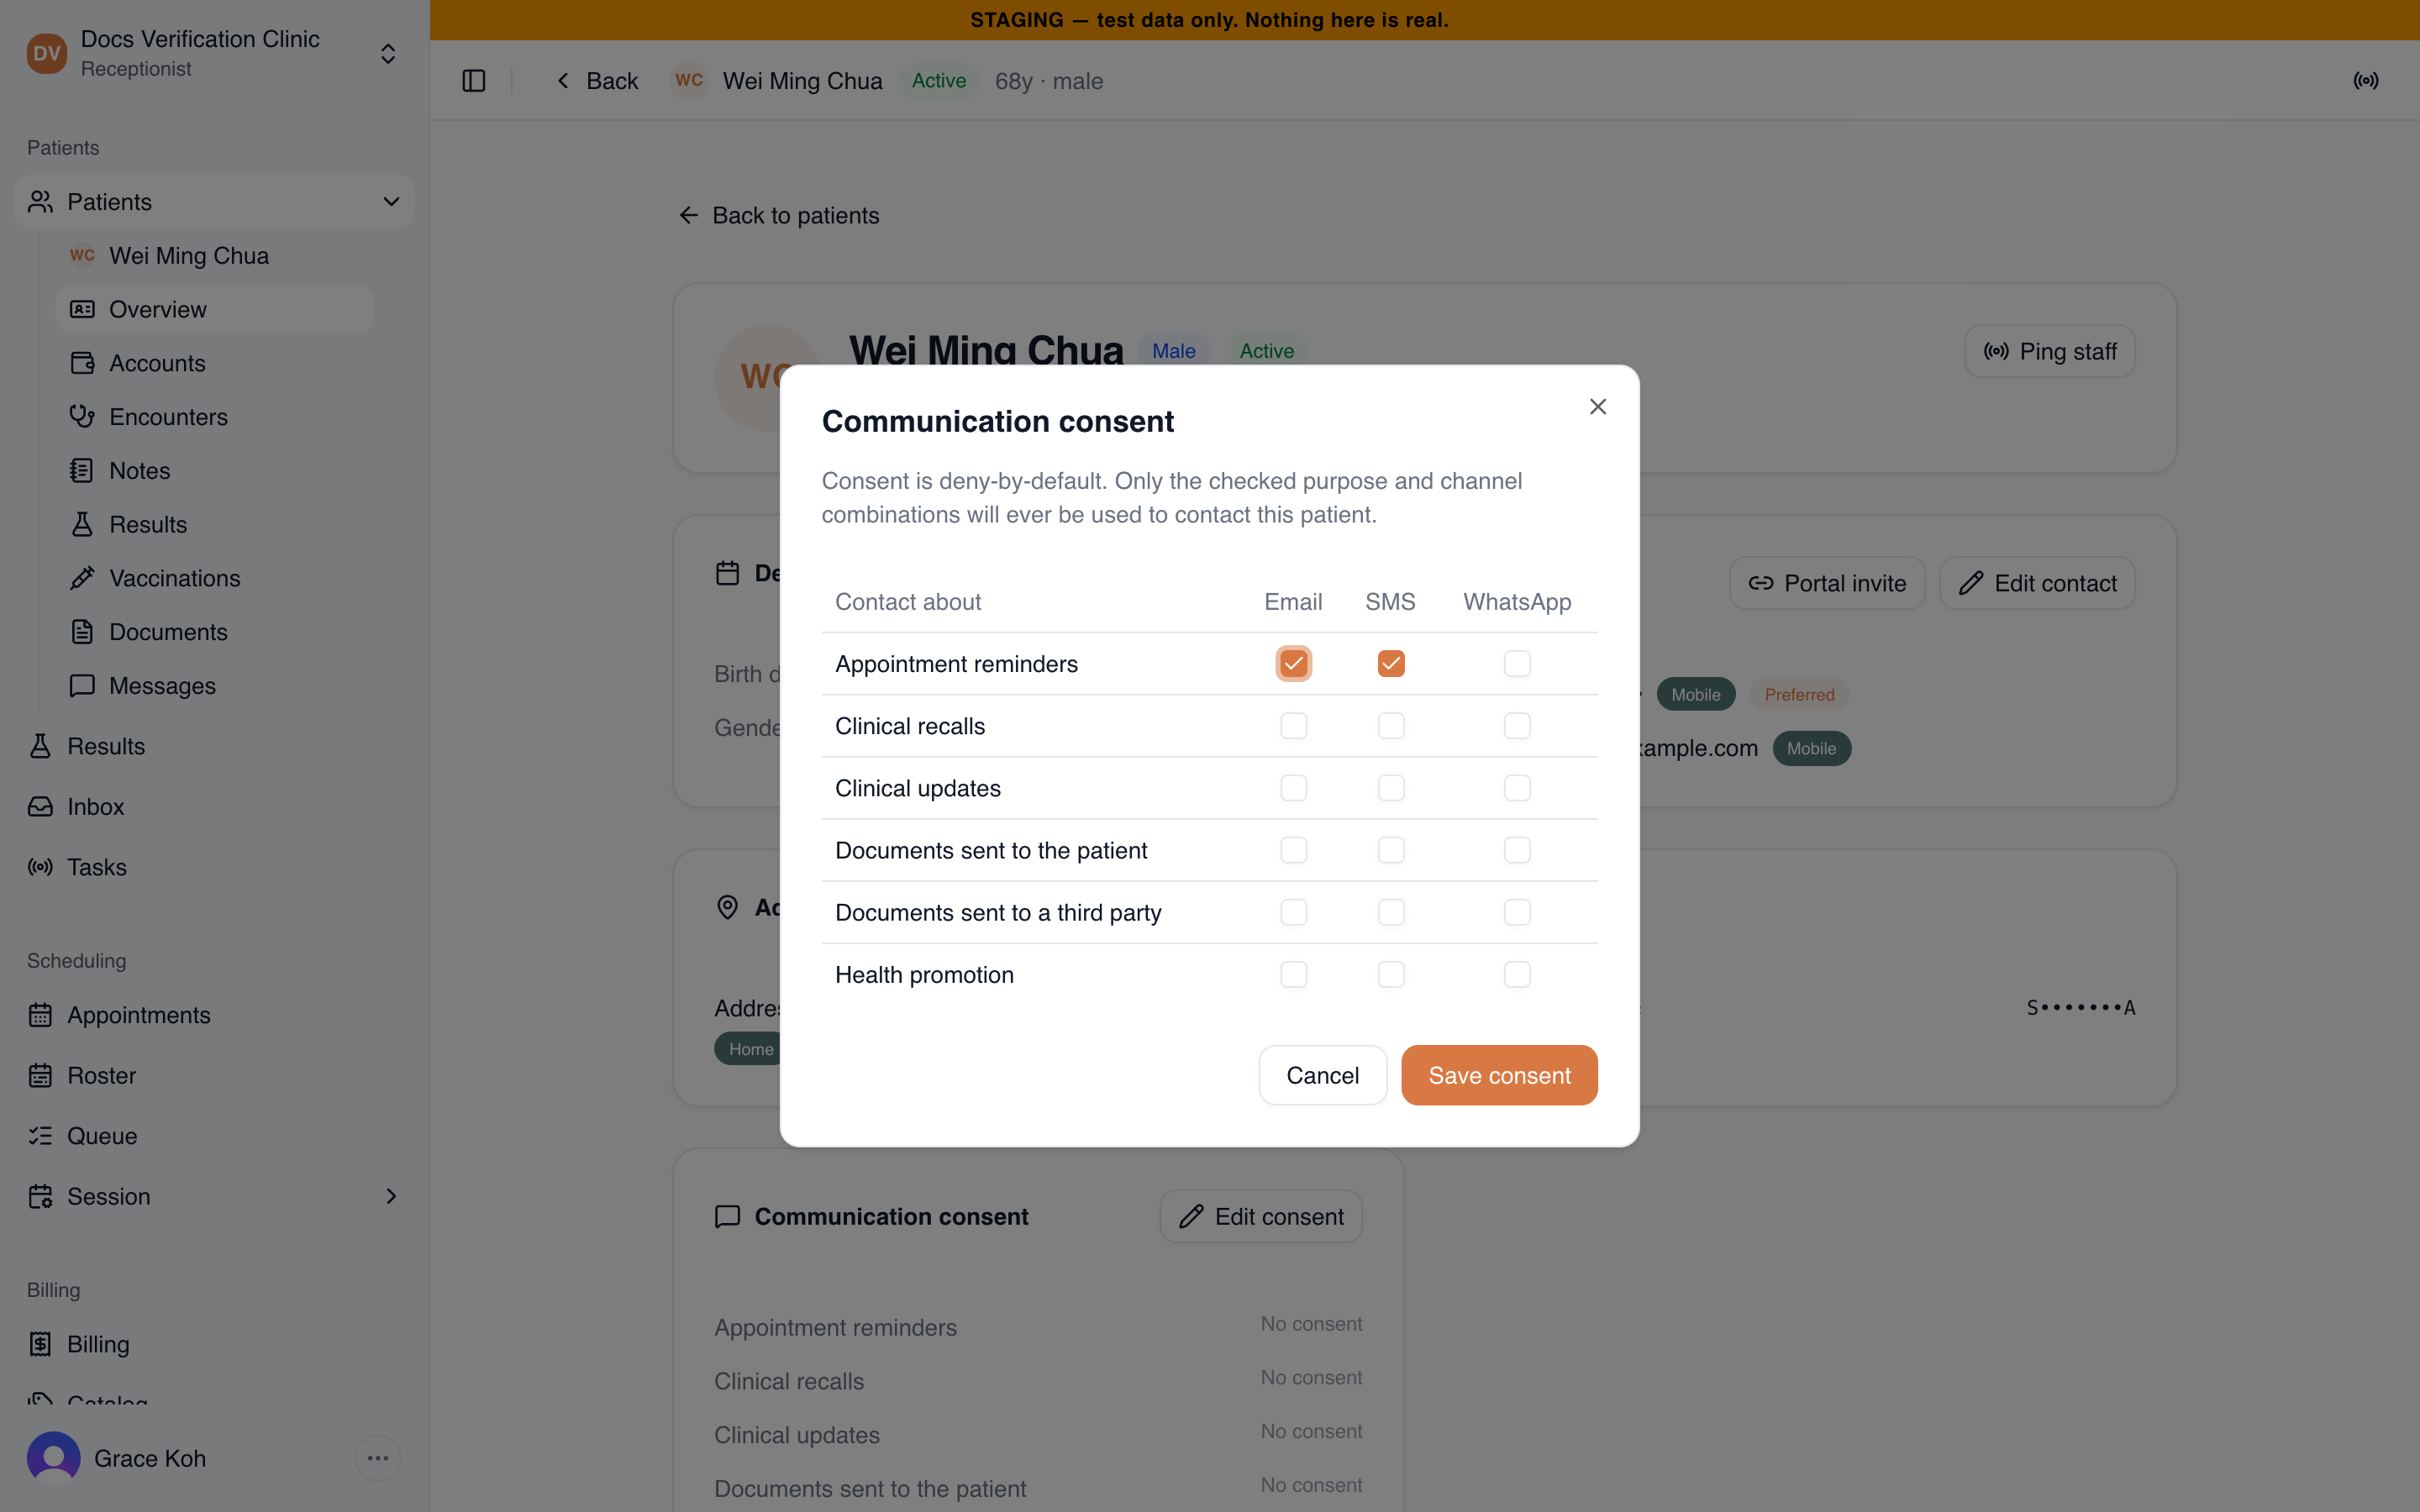
The consent grid
Saving needs your account to be linked to a clinical profile. Otherwise you see “Your account is not linked to a practitioner profile. Contact an administrator.” Ask a Clinic Admin for help. If the consent changed after you opened the chart, you see the same “record changed” message as for contact details.
Inviting a patient to register themselves
Use this for a person who asked for an appointment but is not registered yet.
- Select Invite to self-register on the Patients page. The Invite to self-register page opens.
- Select Invite to self-register again, optionally enter a given and family name, choose SMS or Email, and enter the phone number or email address.
- Select Send link.
The patient receives a one-time link that expires after 7 days. The Sent registration links table shows each invite as pending, completed, expired or revoked, and a View patient link once completed. If the clinic’s text message or email service is not set up, the dialog shows an error and the patient does not receive the link.
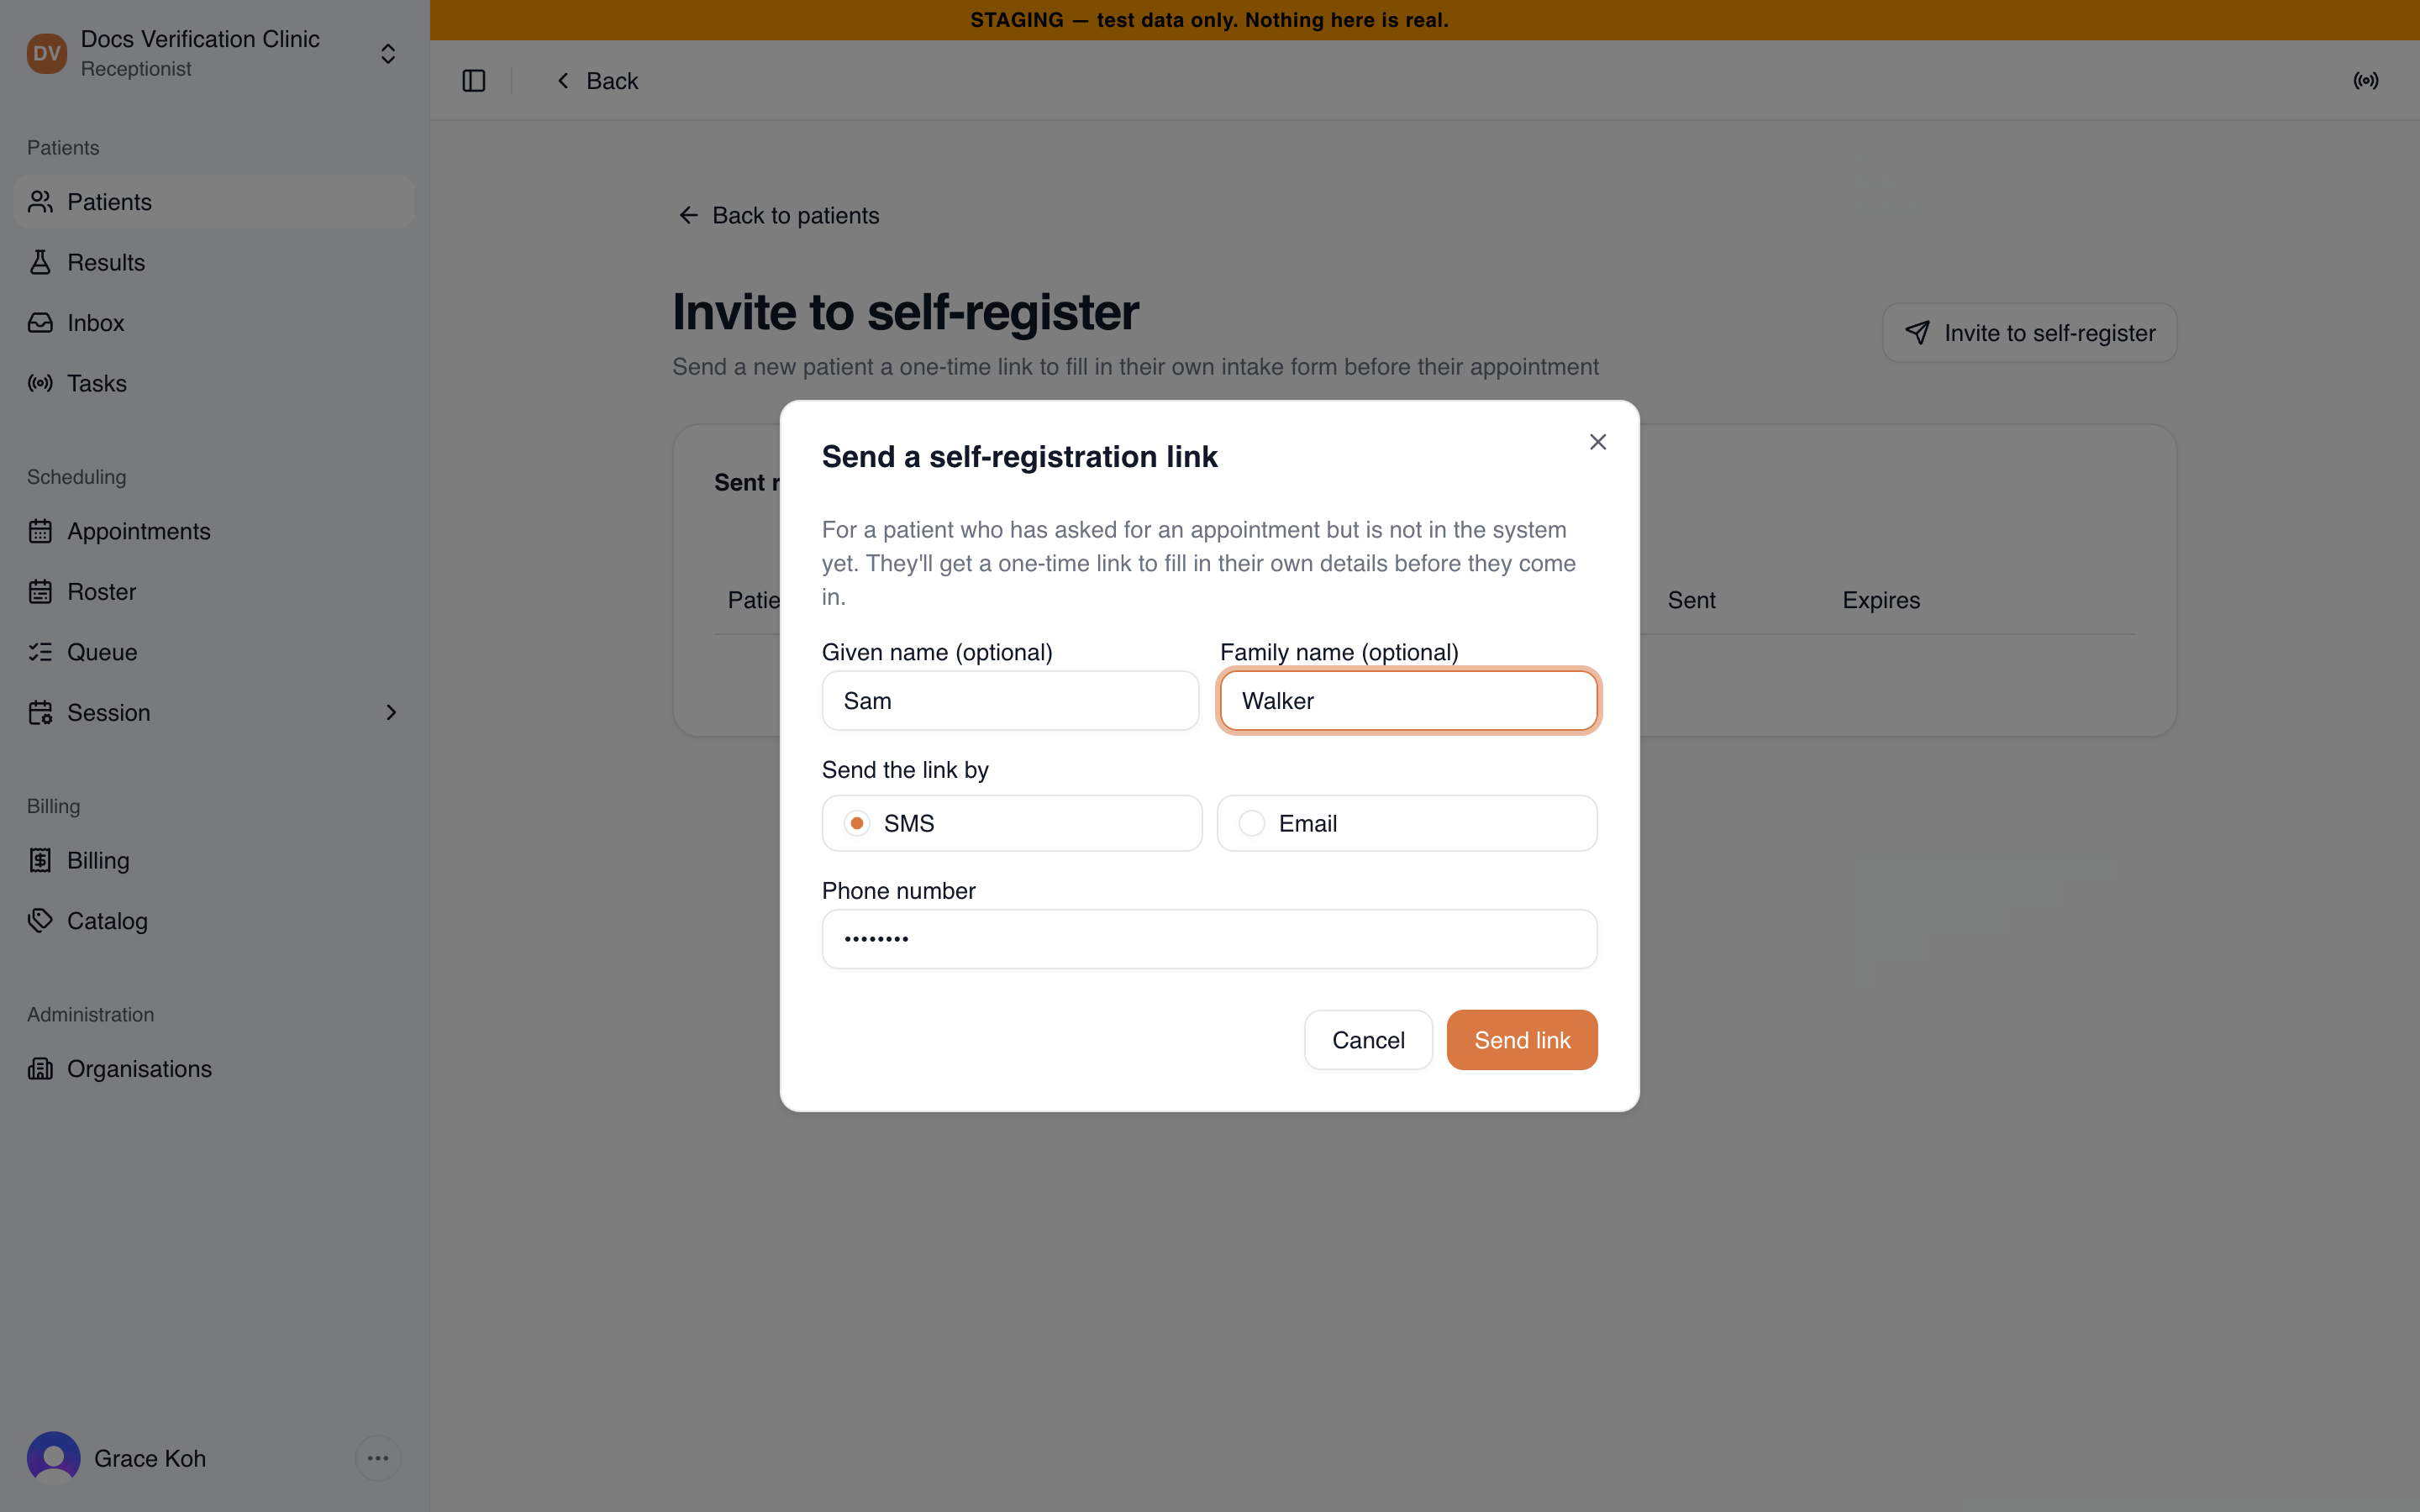
Sending a registration link
What the patient sees: a registration form on the patient app. See Patient Portal.
When the patient submits the form, their chart shows the Patient-reported intake card labeled Unverified. It lists drug allergies, reported health conditions, current treatment and medications, and hospitalization history. These answers are patient-reported and not checked against clinical records. Confirm allergies, conditions and medications with the patient before you rely on them.
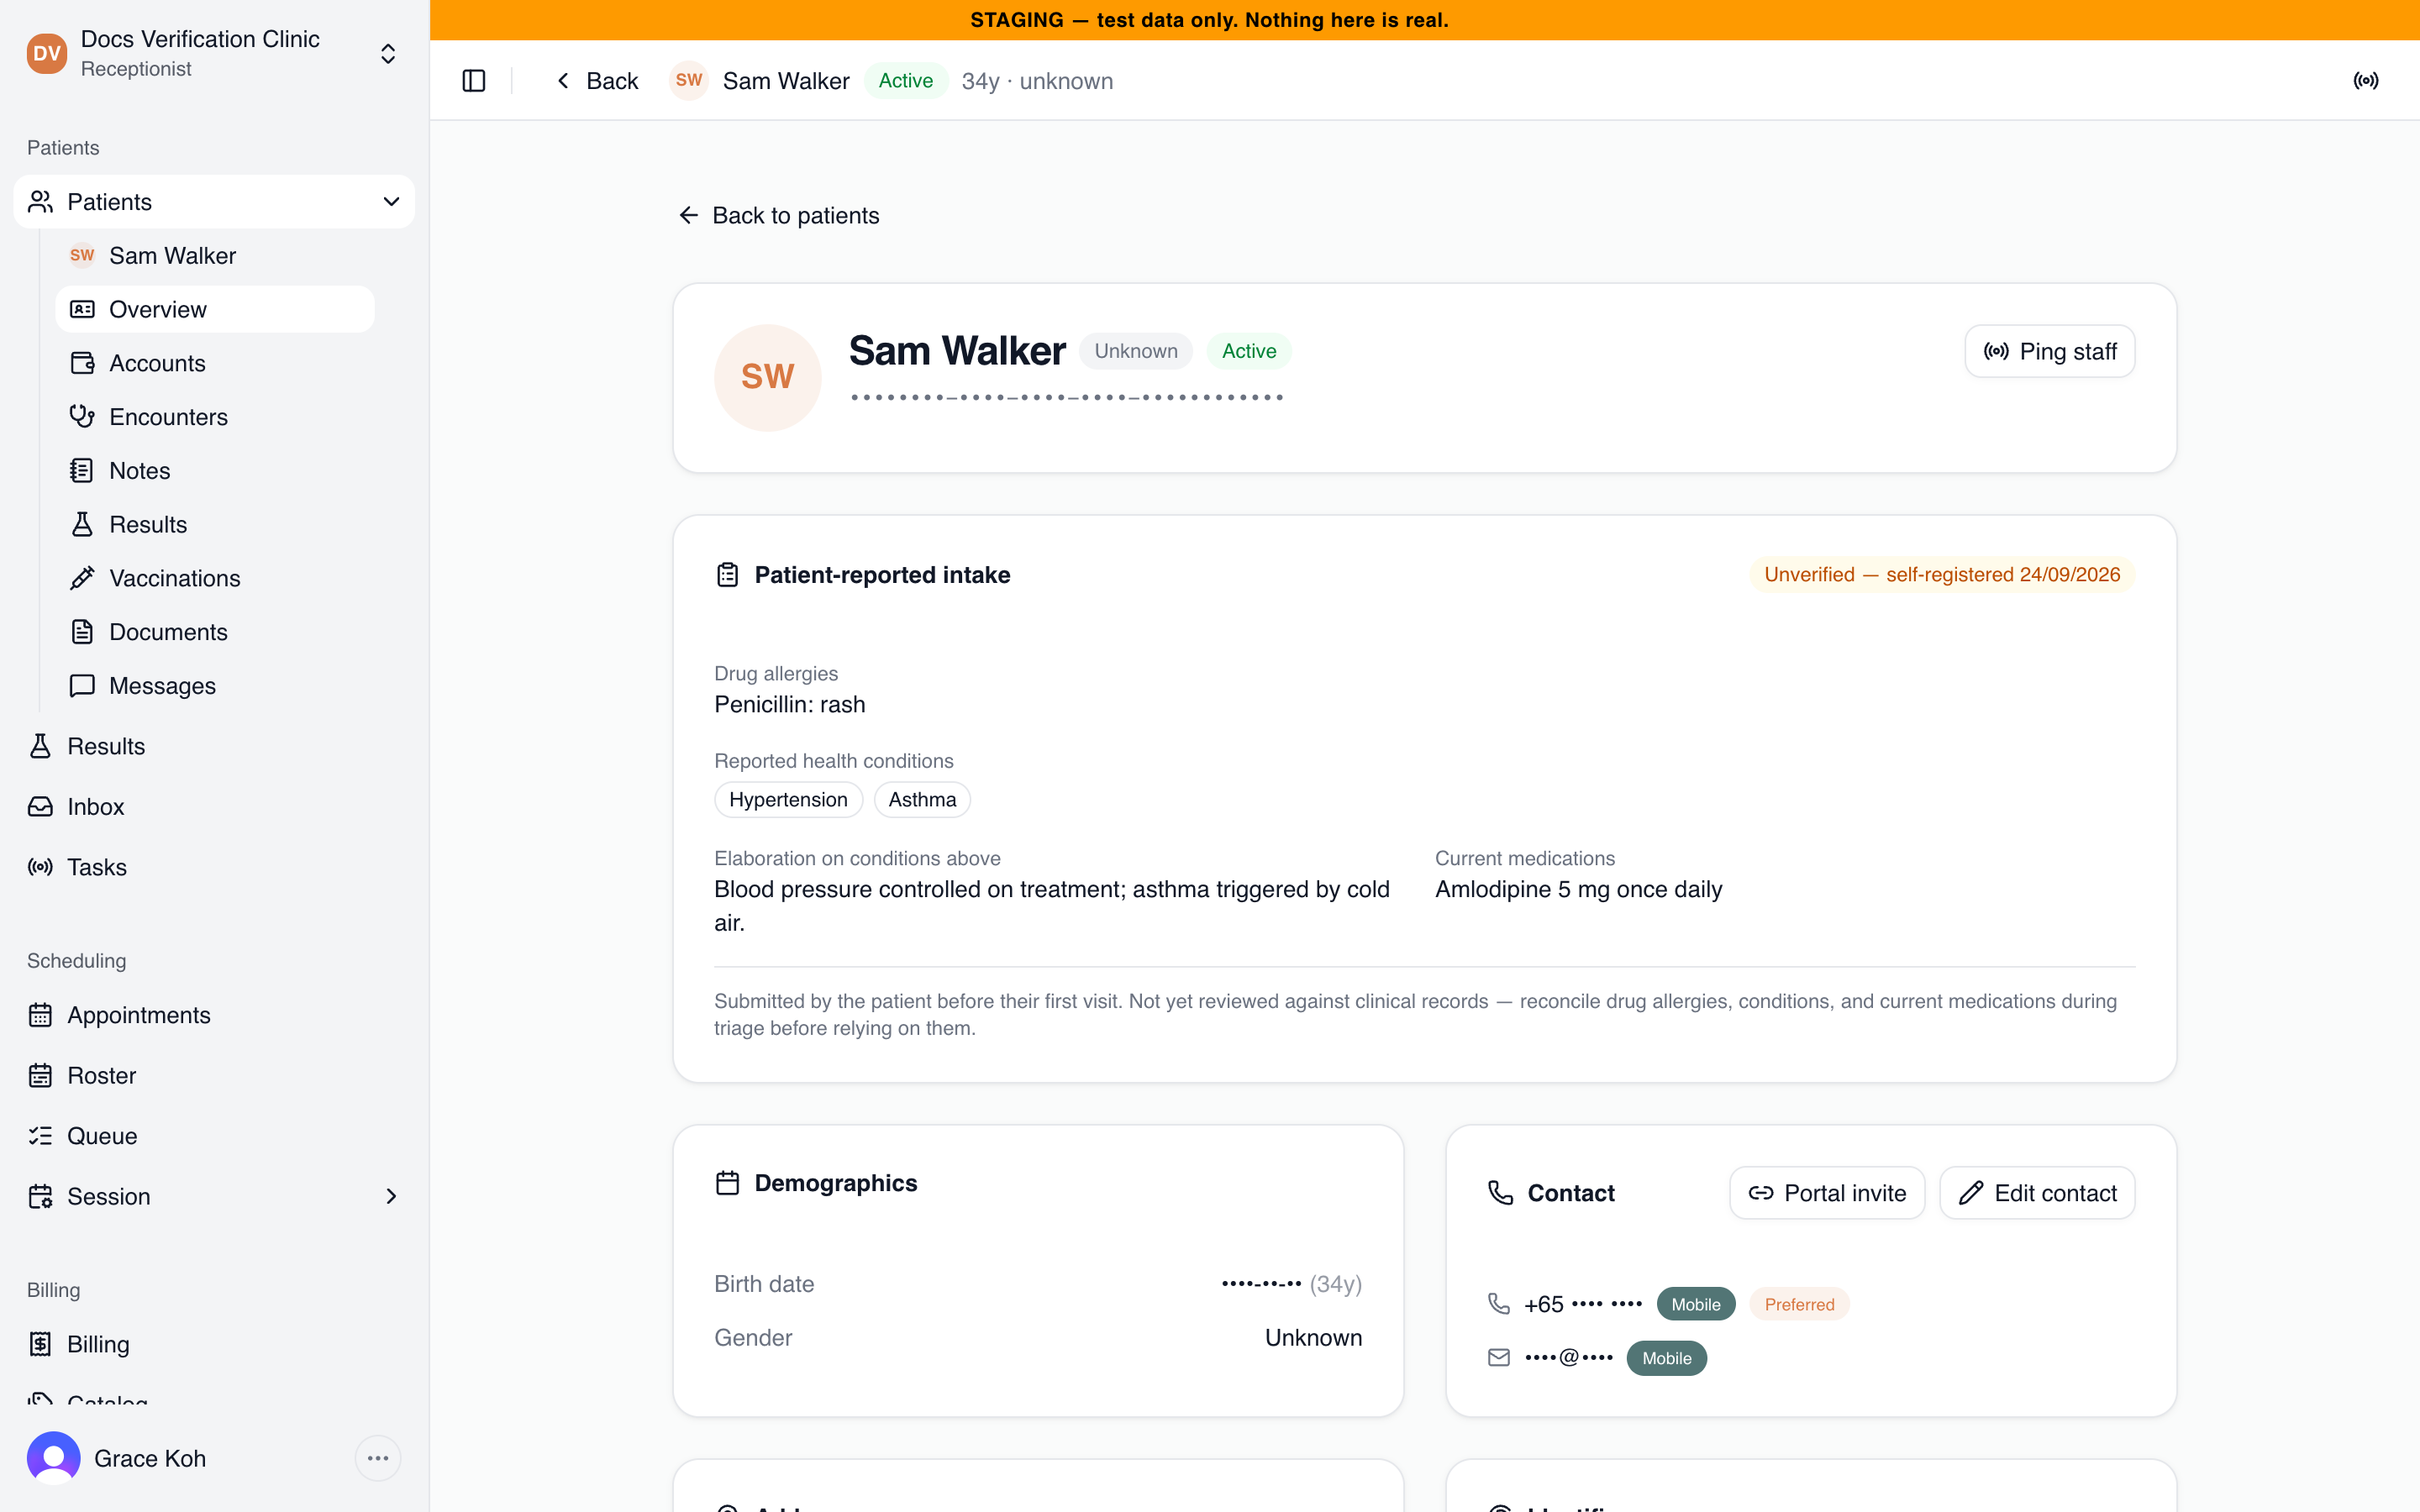
The Patient-reported intake card
Deactivating a patient
- On the Patients page, select the actions menu (three dots) on the patient’s row.
- Select Deactivate patient, then Deactivate.
The patient’s history stays intact and the status becomes Inactive. An inactive patient can no longer be selected for care: Start Encounter is disabled. Use the Inactive filter to find them. The CMS has no button to reactivate a patient; if someone was deactivated in error, restore the record in the clinic’s medical record system rather than registering them again (which the app refuses as a duplicate).
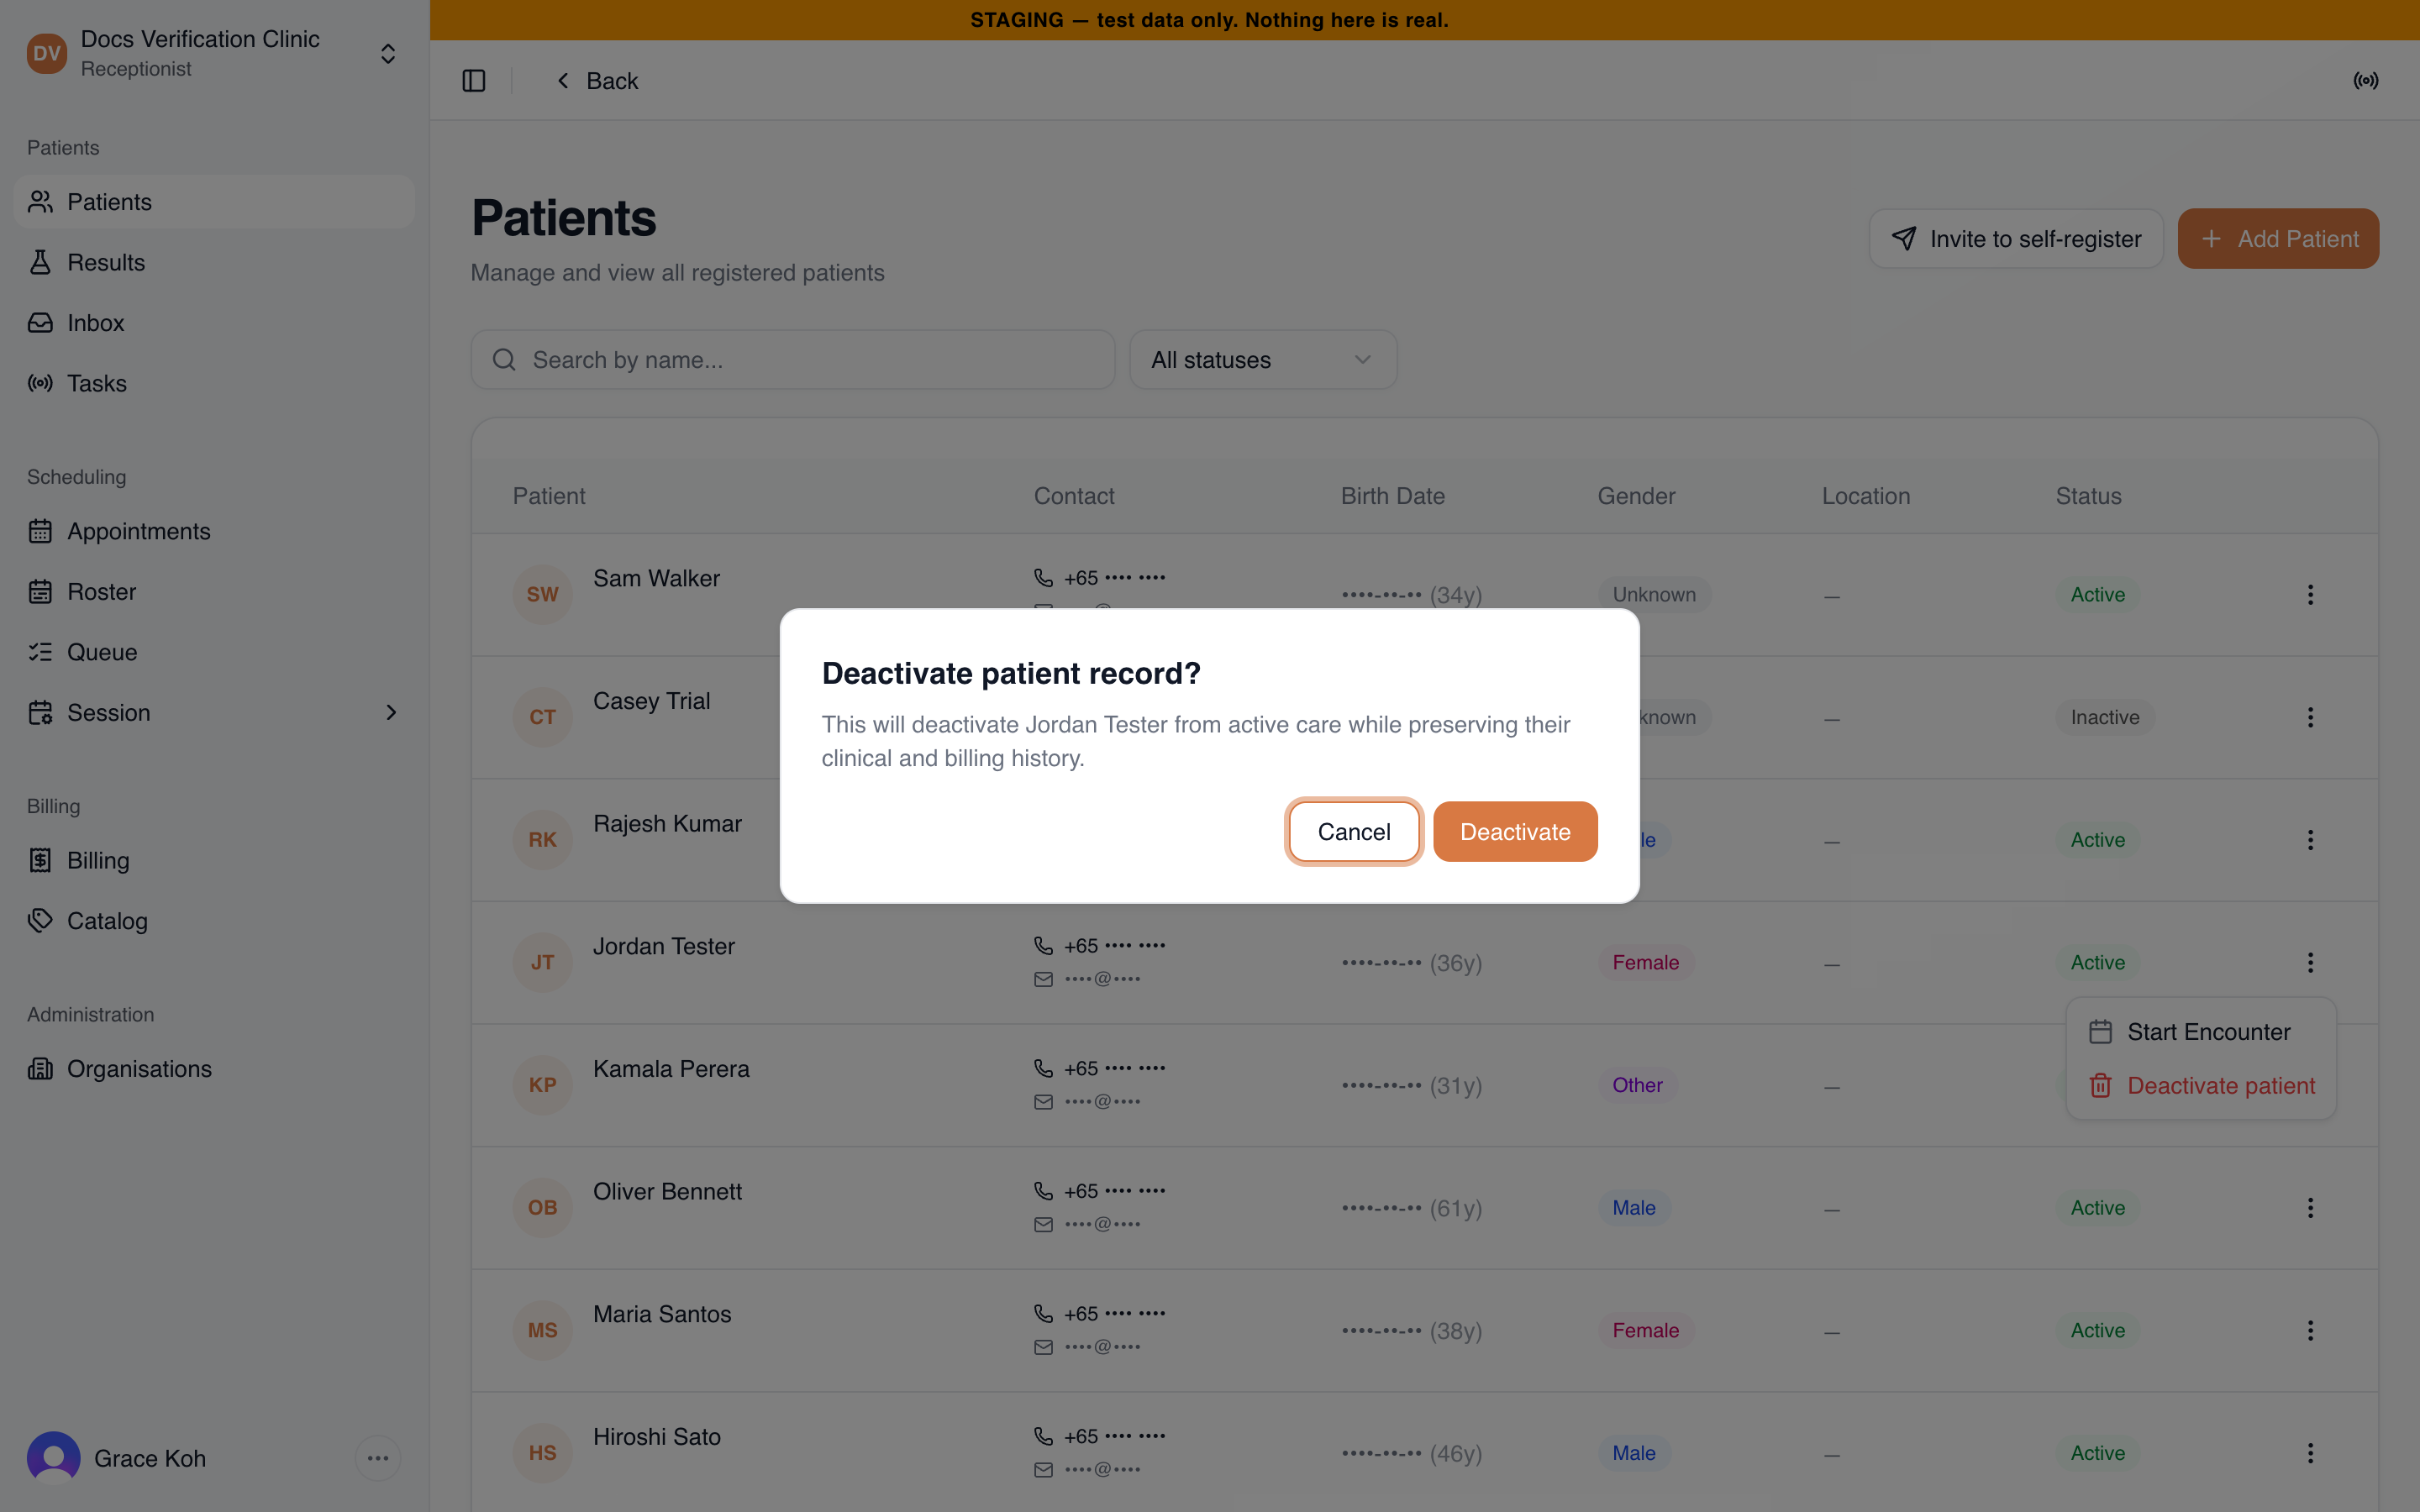
The deactivate confirmation
Related
- Encounters & Clinical Notes: start a visit and write notes.
- Vitals: record and correct readings.
- Patient Portal: how patients connect to their record.