Session Setup
Session setup is where the front desk prepares a clinic location for the day: who is working, which rooms are open, and, for a Clinic Admin, which public displays are live. Find it at Scheduling → Session (/session). A session is one clinic location’s working day.
Who can do this
| Task | Clinic Admin | Receptionist | Doctor | Nurse |
|---|---|---|---|---|
| Open today’s session | Yes | Yes | No | No |
| Mark who is working today | Yes | Yes | No | No |
| Add and assign rooms | Yes | Yes | No | No |
| Add a clinic location | Yes | No | No | No |
| Add, view, and revoke displays | Yes | No | No | No |
A doctor or nurse who opens the page sees a message that says which roles are allowed. In the sidebar, Displays appears under Session only for a Clinic Admin.
1. Choose the location and open today’s session
The page opens on your default location. Use Clinic location to switch. The header shows today’s date and whether the session is Open or Closed.
Opening the page for a location with no session for today opens one for you. You can also select Create session in the sidebar, or on the queue page, choose the location, add an optional Label, and select Open session. A message says “Session opened for today.” If one is already open, it says “A session is already open here today.” A location has at most one open session a day.
When a roster has been published for today, opening the session also marks the rostered doctors, nurses, and receptionists as working. See Rostering.
A Clinic Admin can add a location with Add location: enter a Name, a Code, and optionally an Address, then save. A message says “Clinic location created”. Codes are lower case, and a code already in use is refused.
2. Mark who is working today
Under Who is working today, tick each doctor, nurse, and receptionist on duty and select Save working staff. The line beside the button lists the active doctors, for example “2 active doctors: Marcus Lim, Priya Nair”.
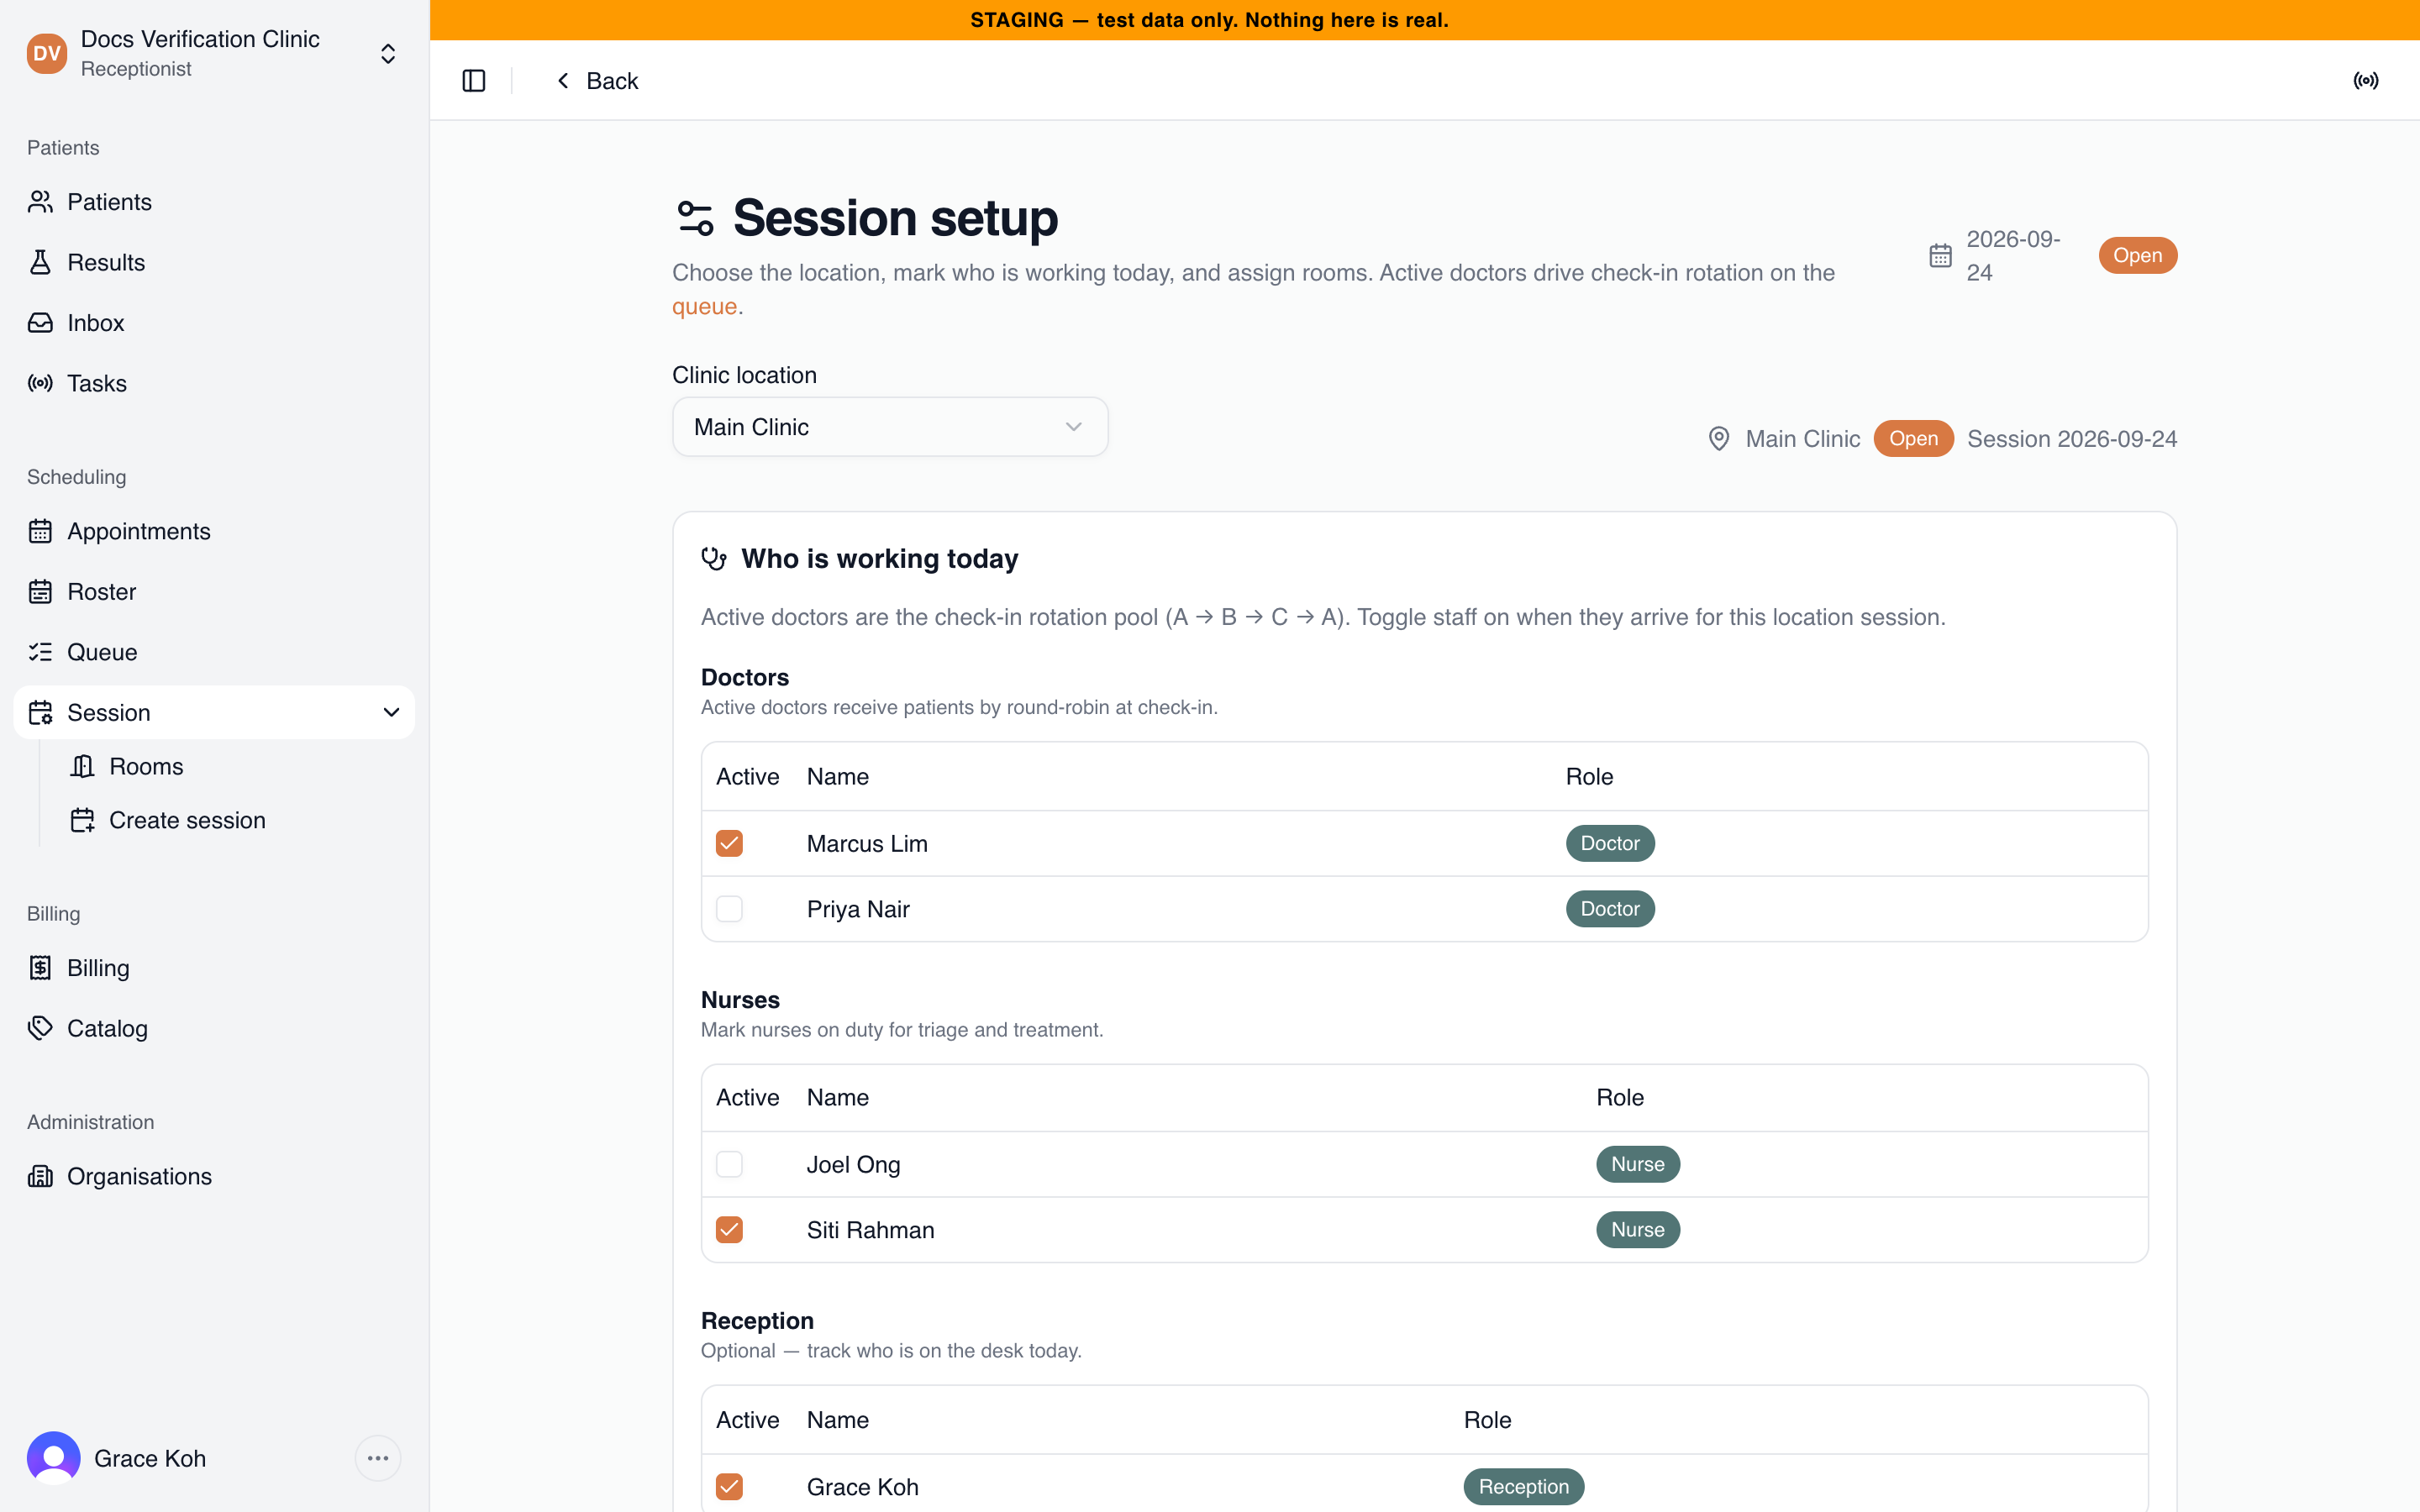
Marking who is working today
Only the doctors ticked here take turns receiving patients when reception checks them in. If no doctor is ticked, a patient still gets a queue ticket, but no doctor is assigned. See Reception Queue. Only active staff appear in the lists. By default every staff member can work at every active location.
3. Assign rooms
Under Rooms, add a room with a Name and a Code, for example “Consult 1” and “c1”, then select Add room. A message says “Room created”.
For each room you can:
- tick or untick Available, for a room that cannot be used today
- choose the Assigned staff, a doctor or nurse who is marked as working today
- add a note, for example “equipment down”
Select Save rooms to save every change at once, or Discard changes to go back. A message says “Room assignment saved”. Rooms cannot be changed once the session is closed. Rooms you set up here are the ones reception can call patients to. See Reception Queue.
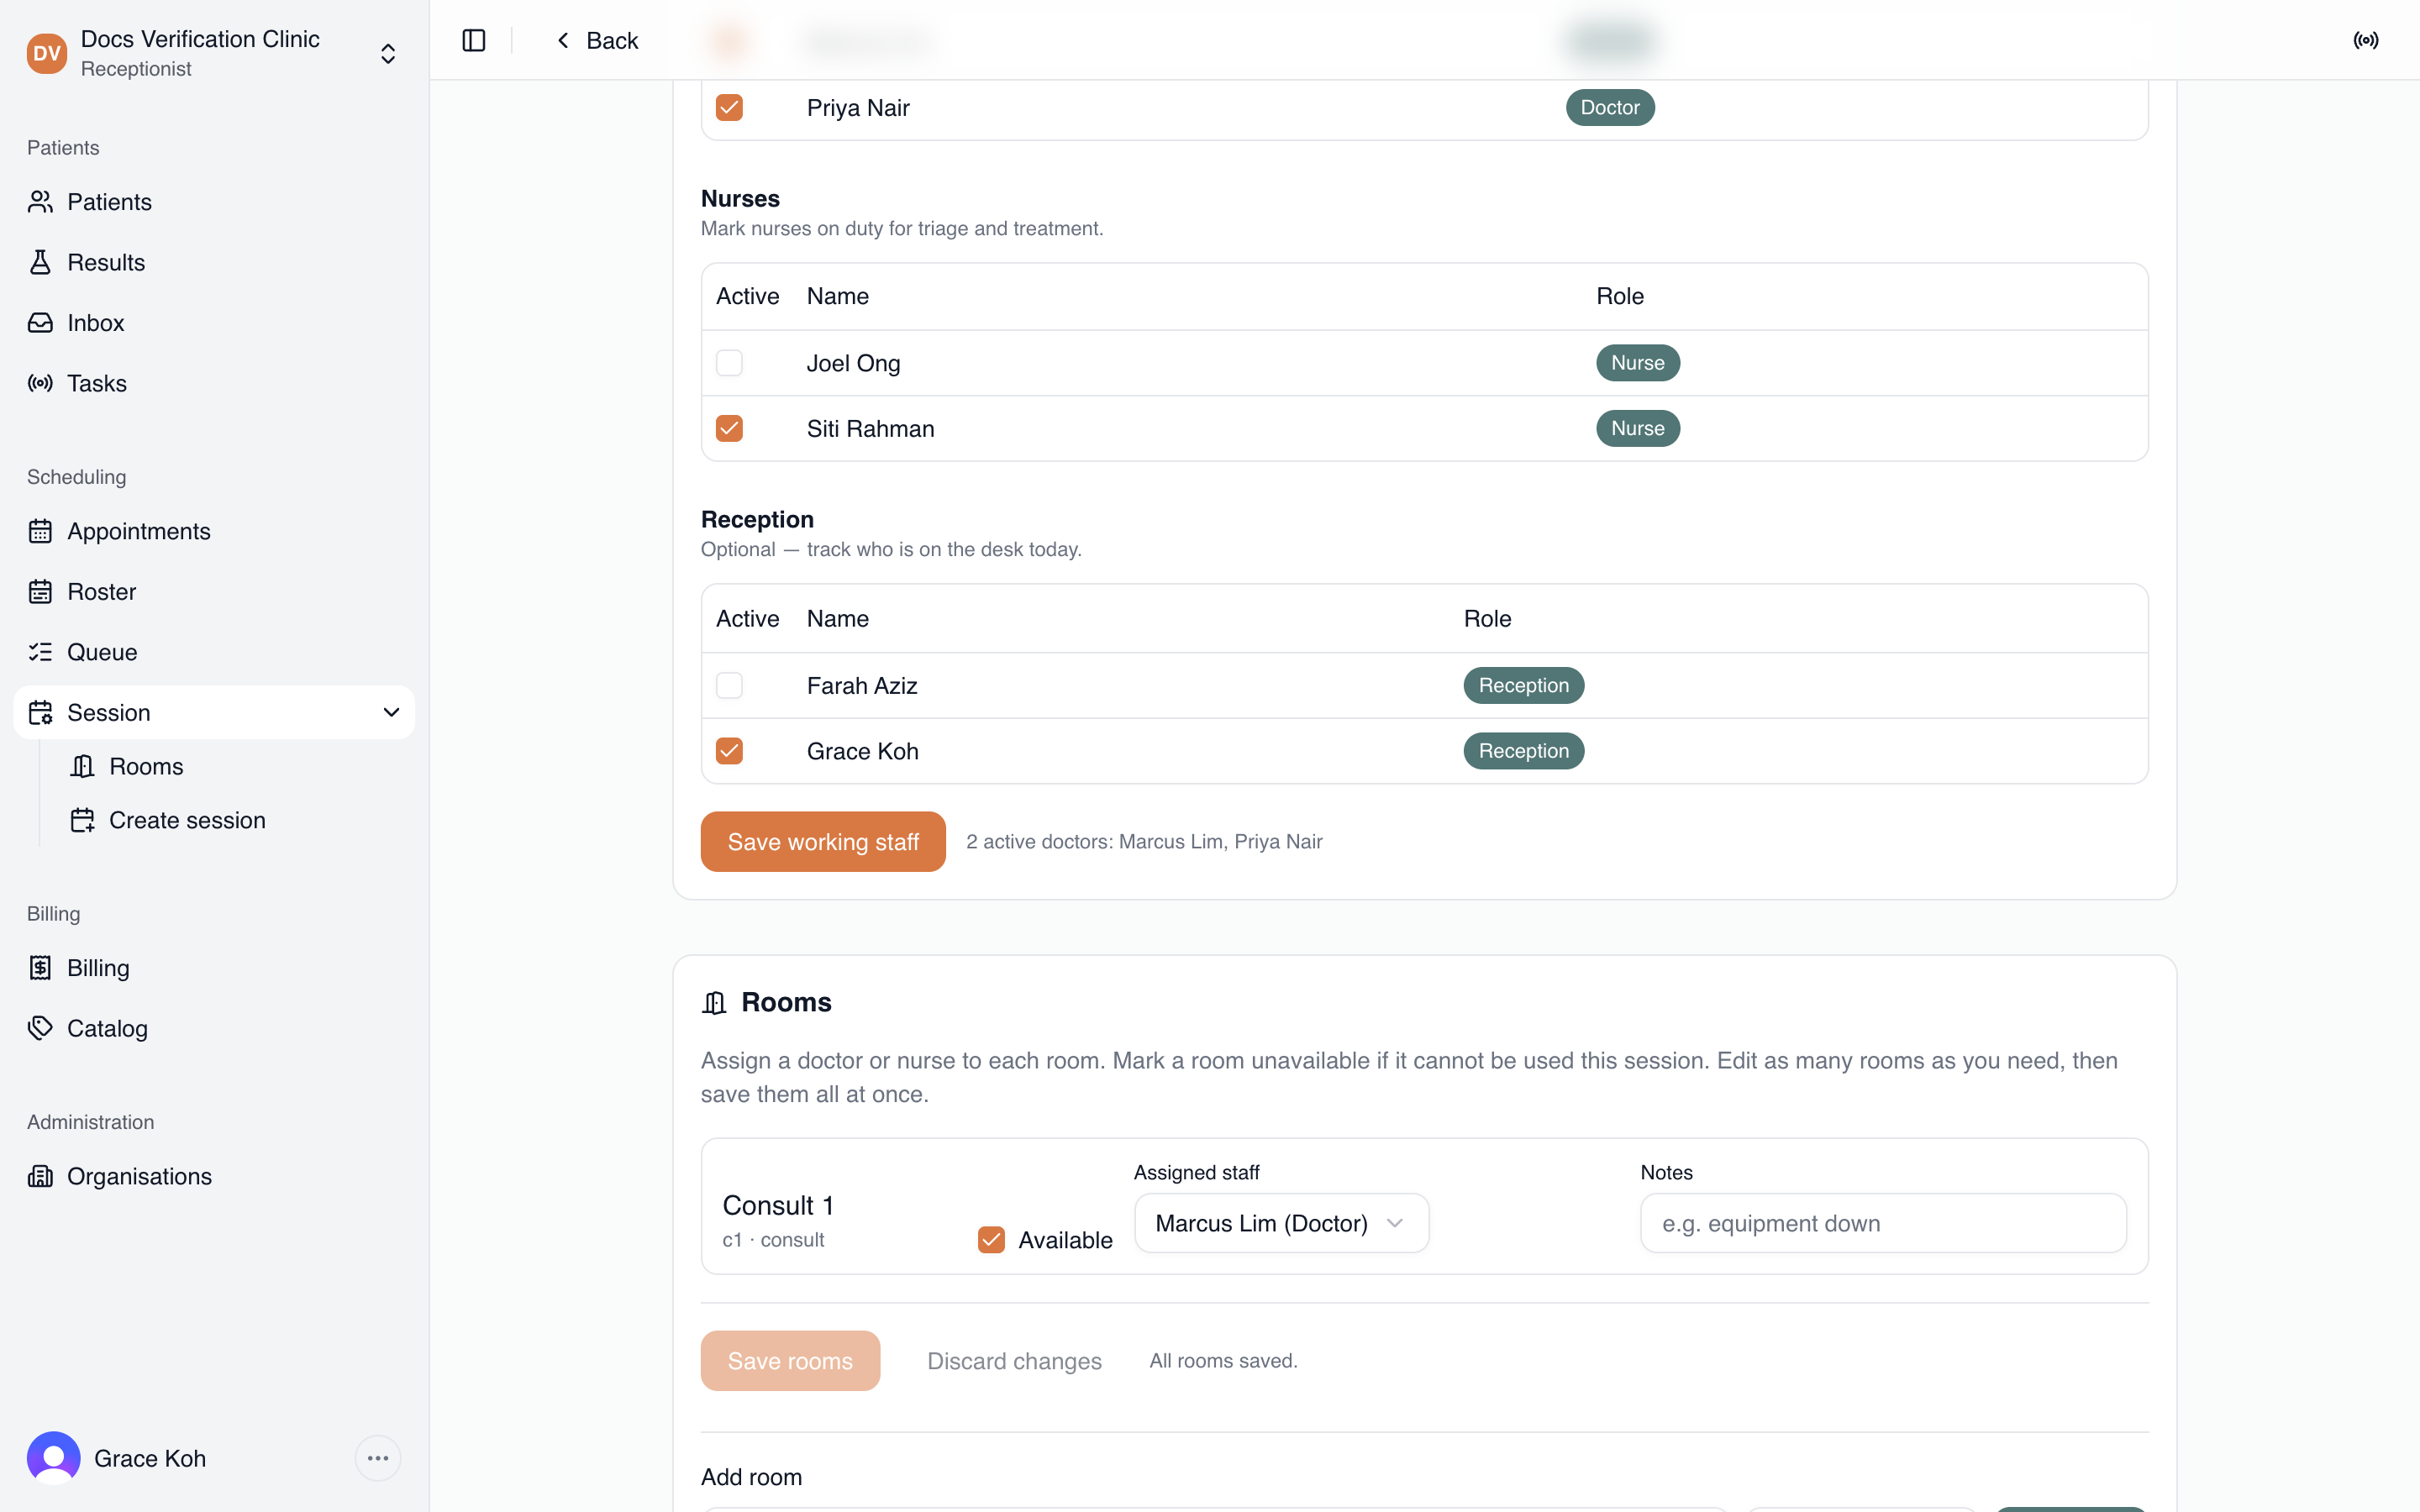
A room with its assigned doctor
4. Manage displays (Clinic Admin only)
The Displays section, below the rooms, lists the public boards for the location. Only a Clinic Admin sees it. See Patient-Facing Displays.
Related
- Reception Queue: check patients in once the session is open.
- Rostering: plan the week so sessions start with the right staff.
- Appointments: the doctor list for booking follows the same location rule.